one really nice feature of darktable is its lens correction module. this module helps to eliminate optical distortion that might be found on zoom as well on prime lenses. due to, it is based on the free available lensfun library, already many camera and a huge amount of lens profiles are available to apply. even correction profiles for mobile phones and drones can be found.
despite the library is continuously updated with new profiles it does not contain yet all ever build and available lenses. not mention the hundreds of different camera lens combinations. beside the elimination of optical distortion, the library also could provide corrections for transversal chromatic aberration (TCA) and vignetting.
if a certain lens or camera is not yet supported by the library, those combinations can be added to the library, for example by making use of torsten brongers calibration service. the website explains what features needs to be shown on images to allow a lens calibration. if everything is fine with them the camera lens combination will than end up some times later in the library.
the service makes it actually very easy to add more calibration profiles – “just take a picture with your digital camera and upload it”. EXIF metadata within images contain all needed information about camera and lens type as well as the camera settings while the picture was taken. this helps to sort in the equipment into the library. but …
⋆ is it that simple for film shooters?! ⋆
⋆ should we provide our camera and lens data to lensfun?! ⋆
⋆ what kind of issues we will face while calibration?! ⋆
luckily there are already many tutorials online explaining how to calibrate lenses with the panorama photo stitcher hugin. two of them are listed below. the first one explains how to remove three possible lens failures (dist./ving./TCA) that lensfun could be used for. whereby the second one is limited on the optical distortion correction – which is sufficient for me … so far! 8)
- tutorial 1 – “create lens calibration data for lensfun”
- tutorial 2 – “hugin tutorial – simple lens calibration”
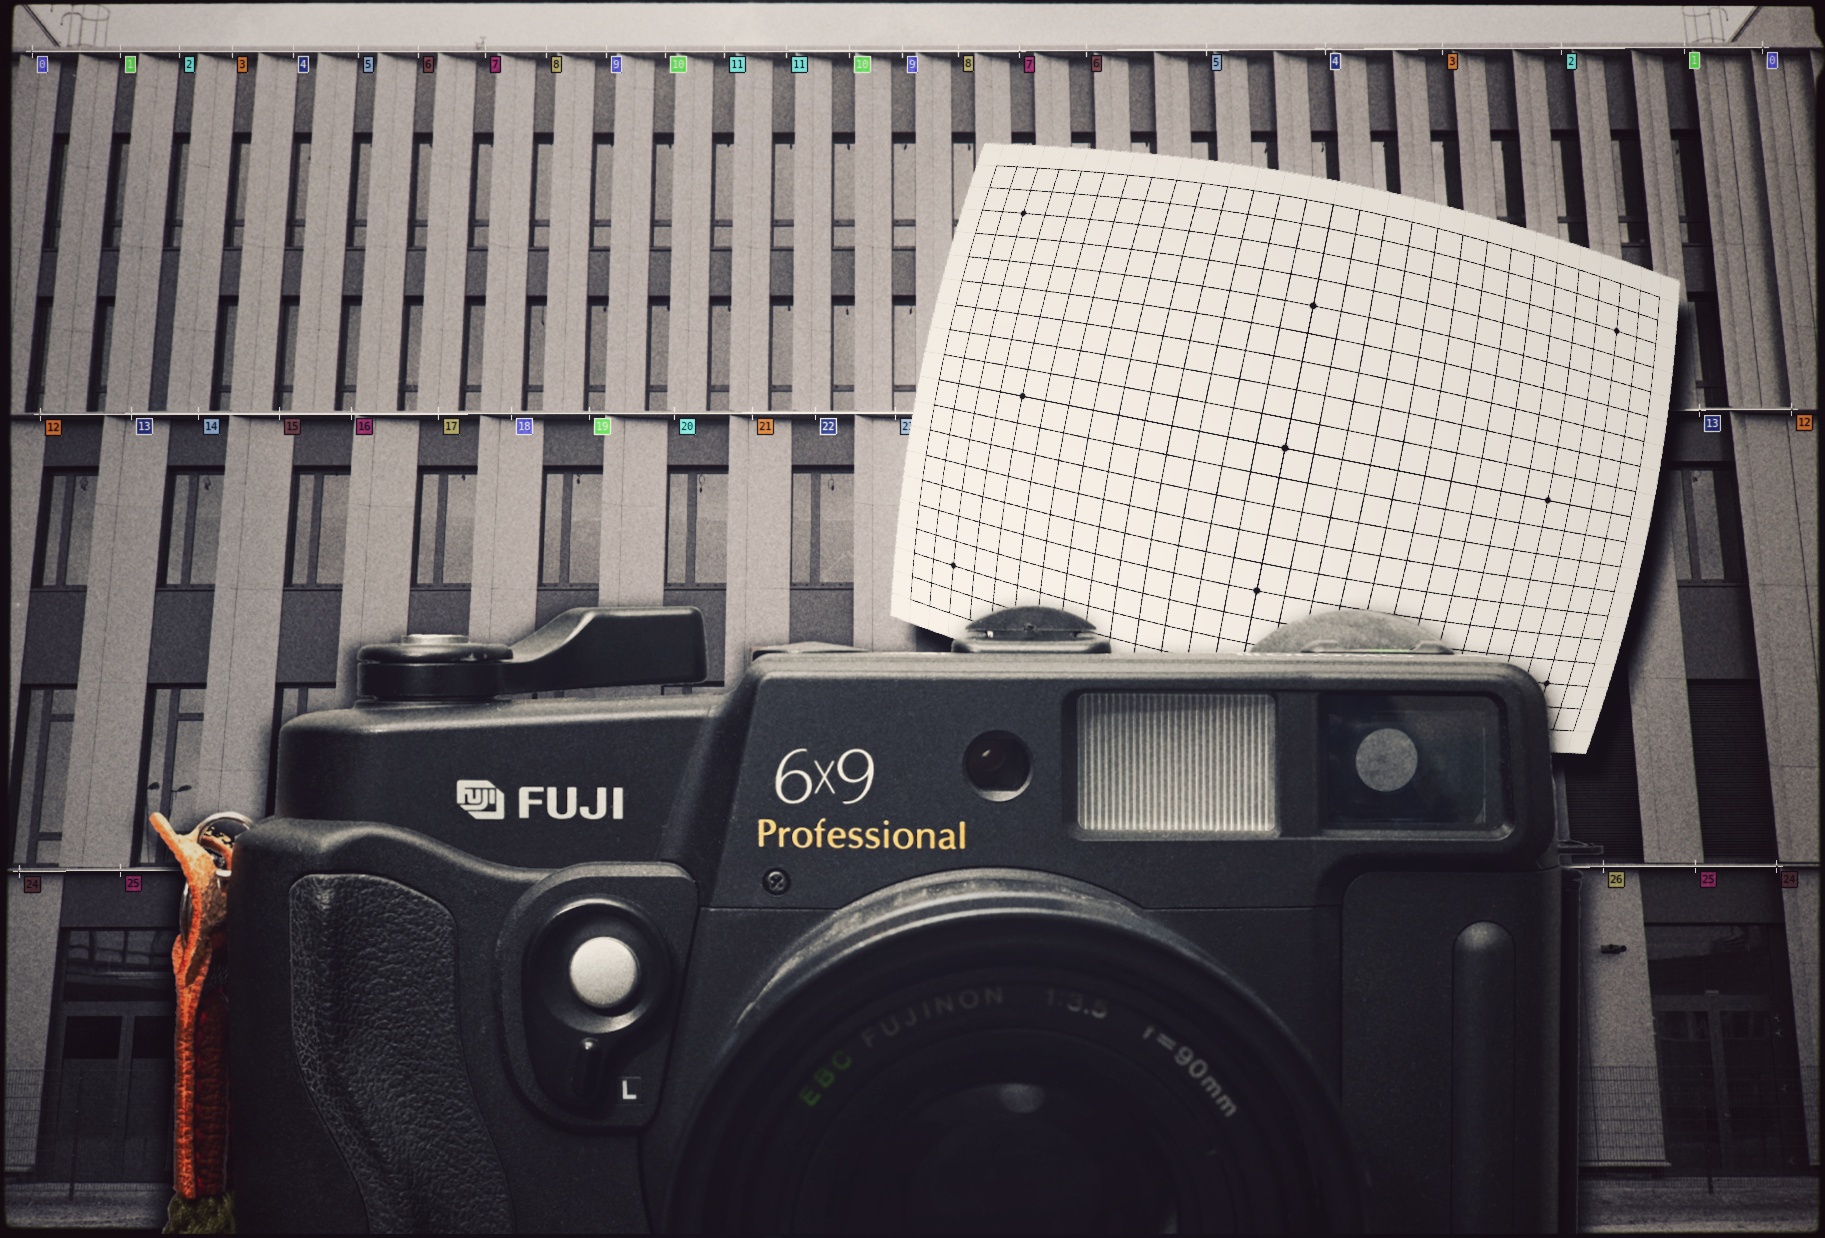
at the moment lensfun does not support the Fuji GW690 III, which is a large rangefinder medium-format camera with fixed lens. let’s see if we can get it calibrated. the film type used for calibration is an ilford delta 400 but in my opinion it could be any other type as well.

take the image and digitize the negative
first of all taking the image does not deviate from using a film camera instead a digital one – settings are same and depends on lighting conditions. but the tutorials say what is imported to have on the image: straight lines! straight lines should be easily found on newer buildings. another solution might be to tie some twine tautly as done for the second tutorial. at least one line should run along the upper part of the image. the second one might be along the third part or diagonal through the picture. as you can see on my images, i have found a nice new building with straight lines.

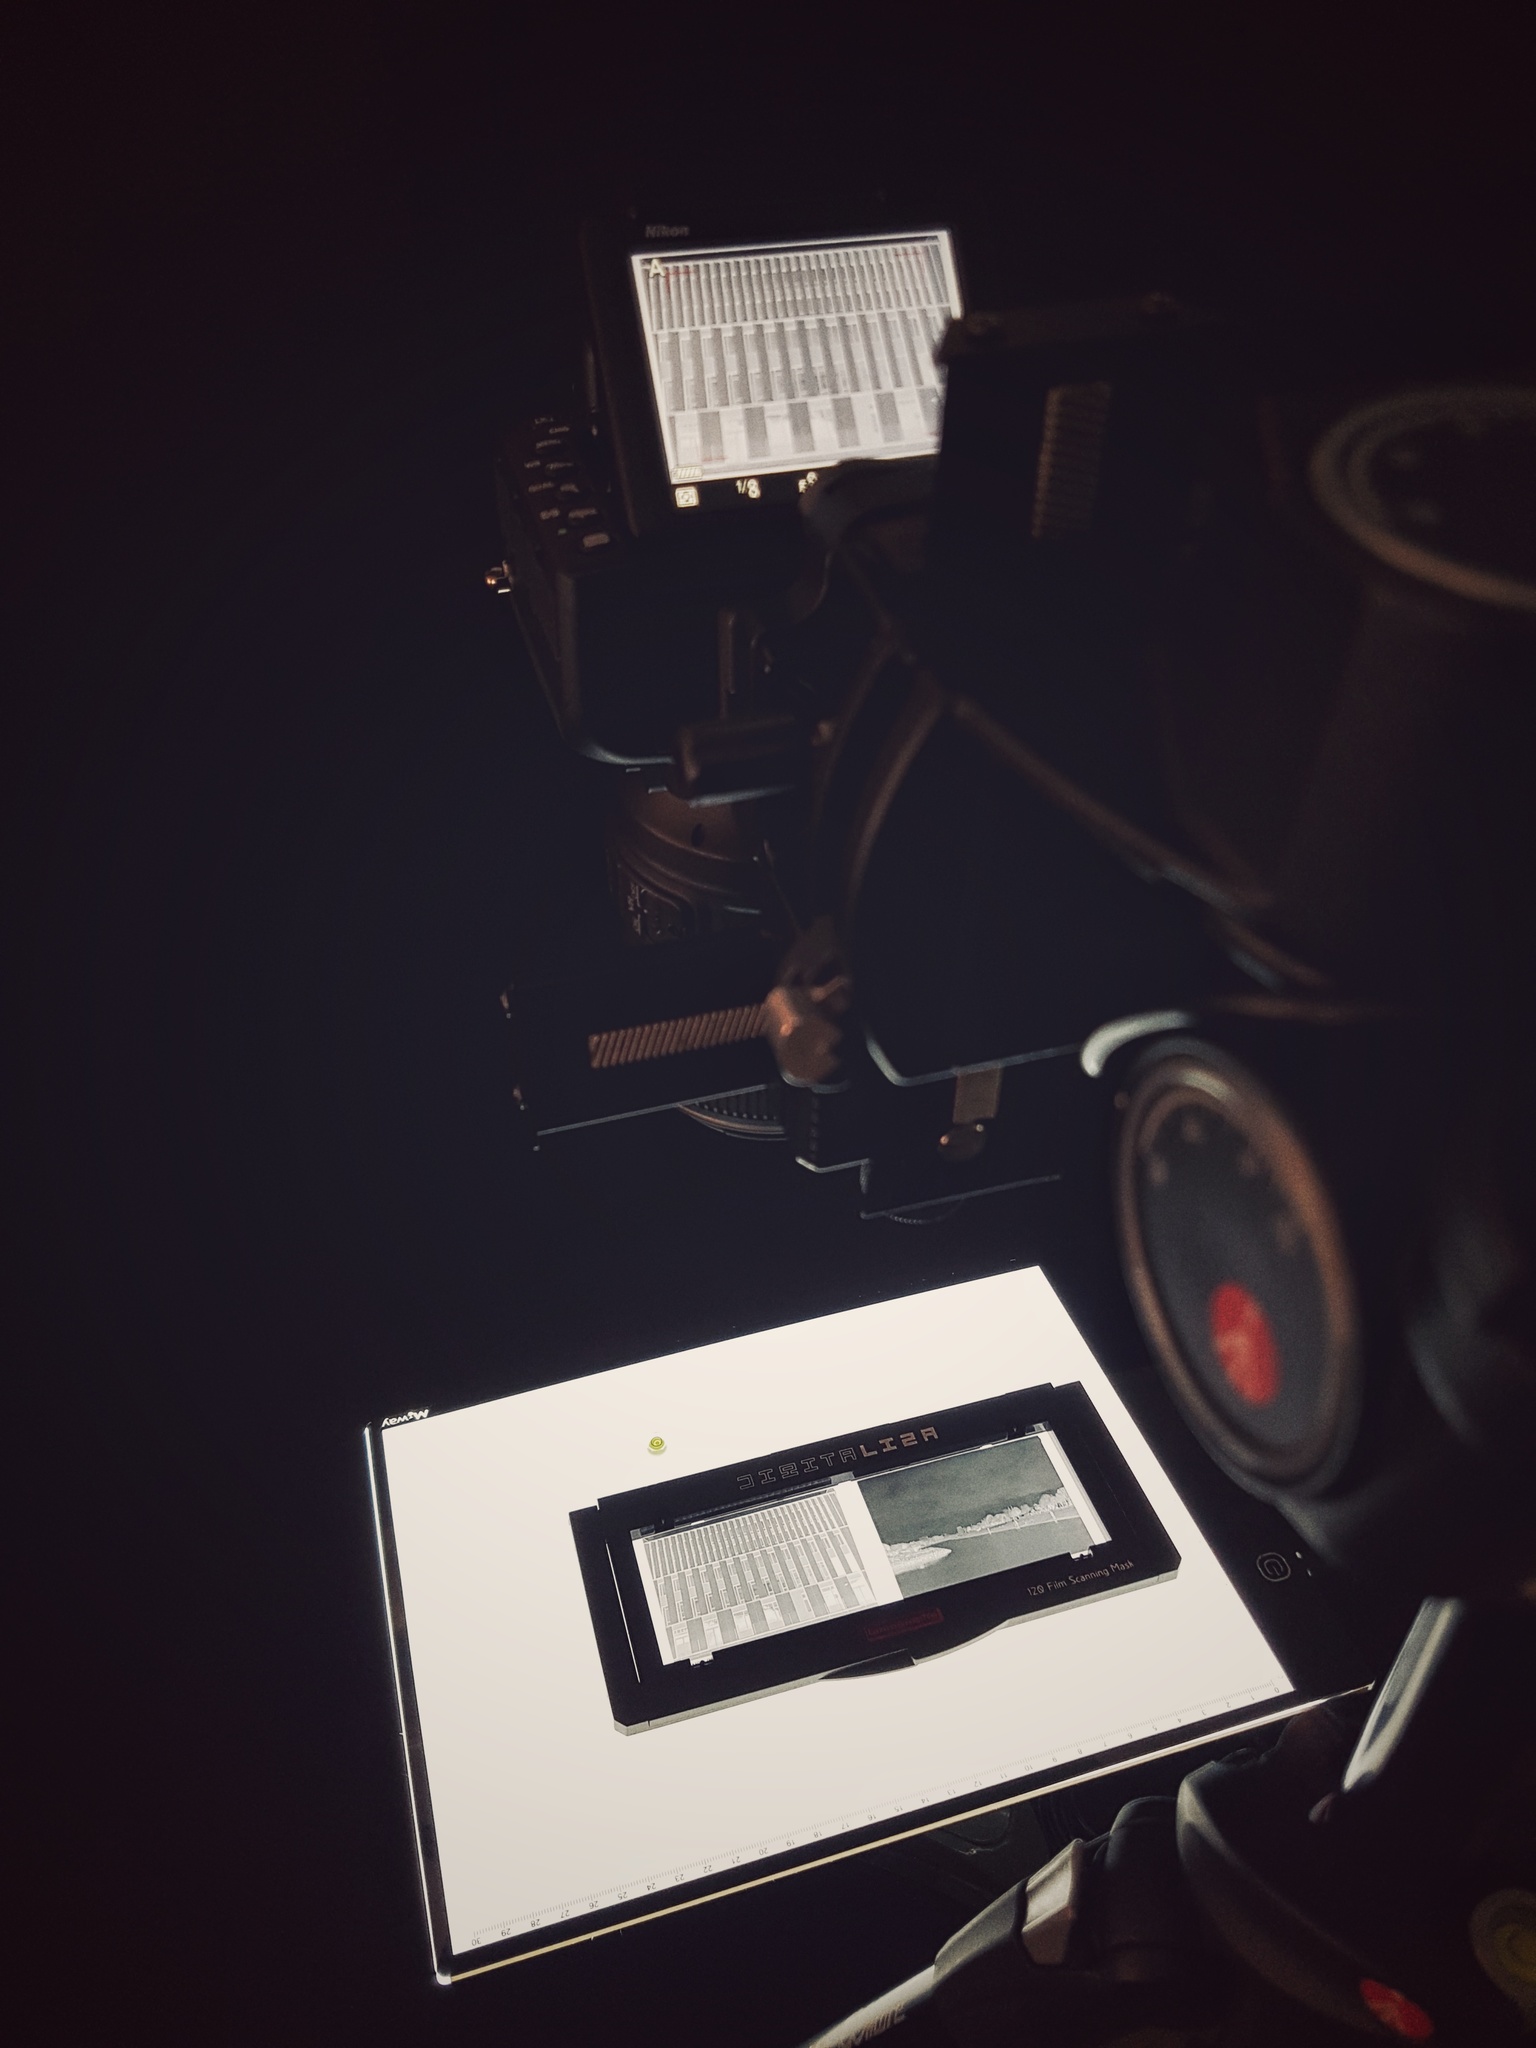

next step is developing the negative and digitalization. already at this time come the first problems. there are two solutions how to digitize a negative – using a film scanner or a digital camera. it should actually doesn’t matters whether using a scanner or a camera, but each solution has its own drawback.
film scanners have their own mechanism for flatten and fixation of the negative. the flexibility to align the negative correctly gets lost. for instance, adjusting the “yaw” orientation is impossible before scanning. in addition, the film holders (that i have seen so far) covers some image parts, so that not the whole negative can be scanned. that’s the reason why i have chosen a dslr. but this time the setup becomes a little challenging. a lot more equipment is needed: light source, tripod, bubble level, camera, lens, patience and so on. it takes some time to align camera and negative accurately so that at the end a correct aligned picture of the negative is taken. a stand which has a baseplate integrated and both are adjusted in a 90° angle would help a lot. using a dslr has on disadvantage – another lens is involved, means … additional distortion!!
the amount of “extra” distortion depends on the used lens. some lenses have a minimal optical distortion, some have a very high distortion effect. but this time it is not that a problem for our goal. wise and foresighted a lens camera combination is chosen which is already supported by the lensfun library. thus, a pre-processing of the digitized negative needs to be applied, before it can be calibrated with hugin. the tool of our trust to remove the additional distortion – of course darktable.
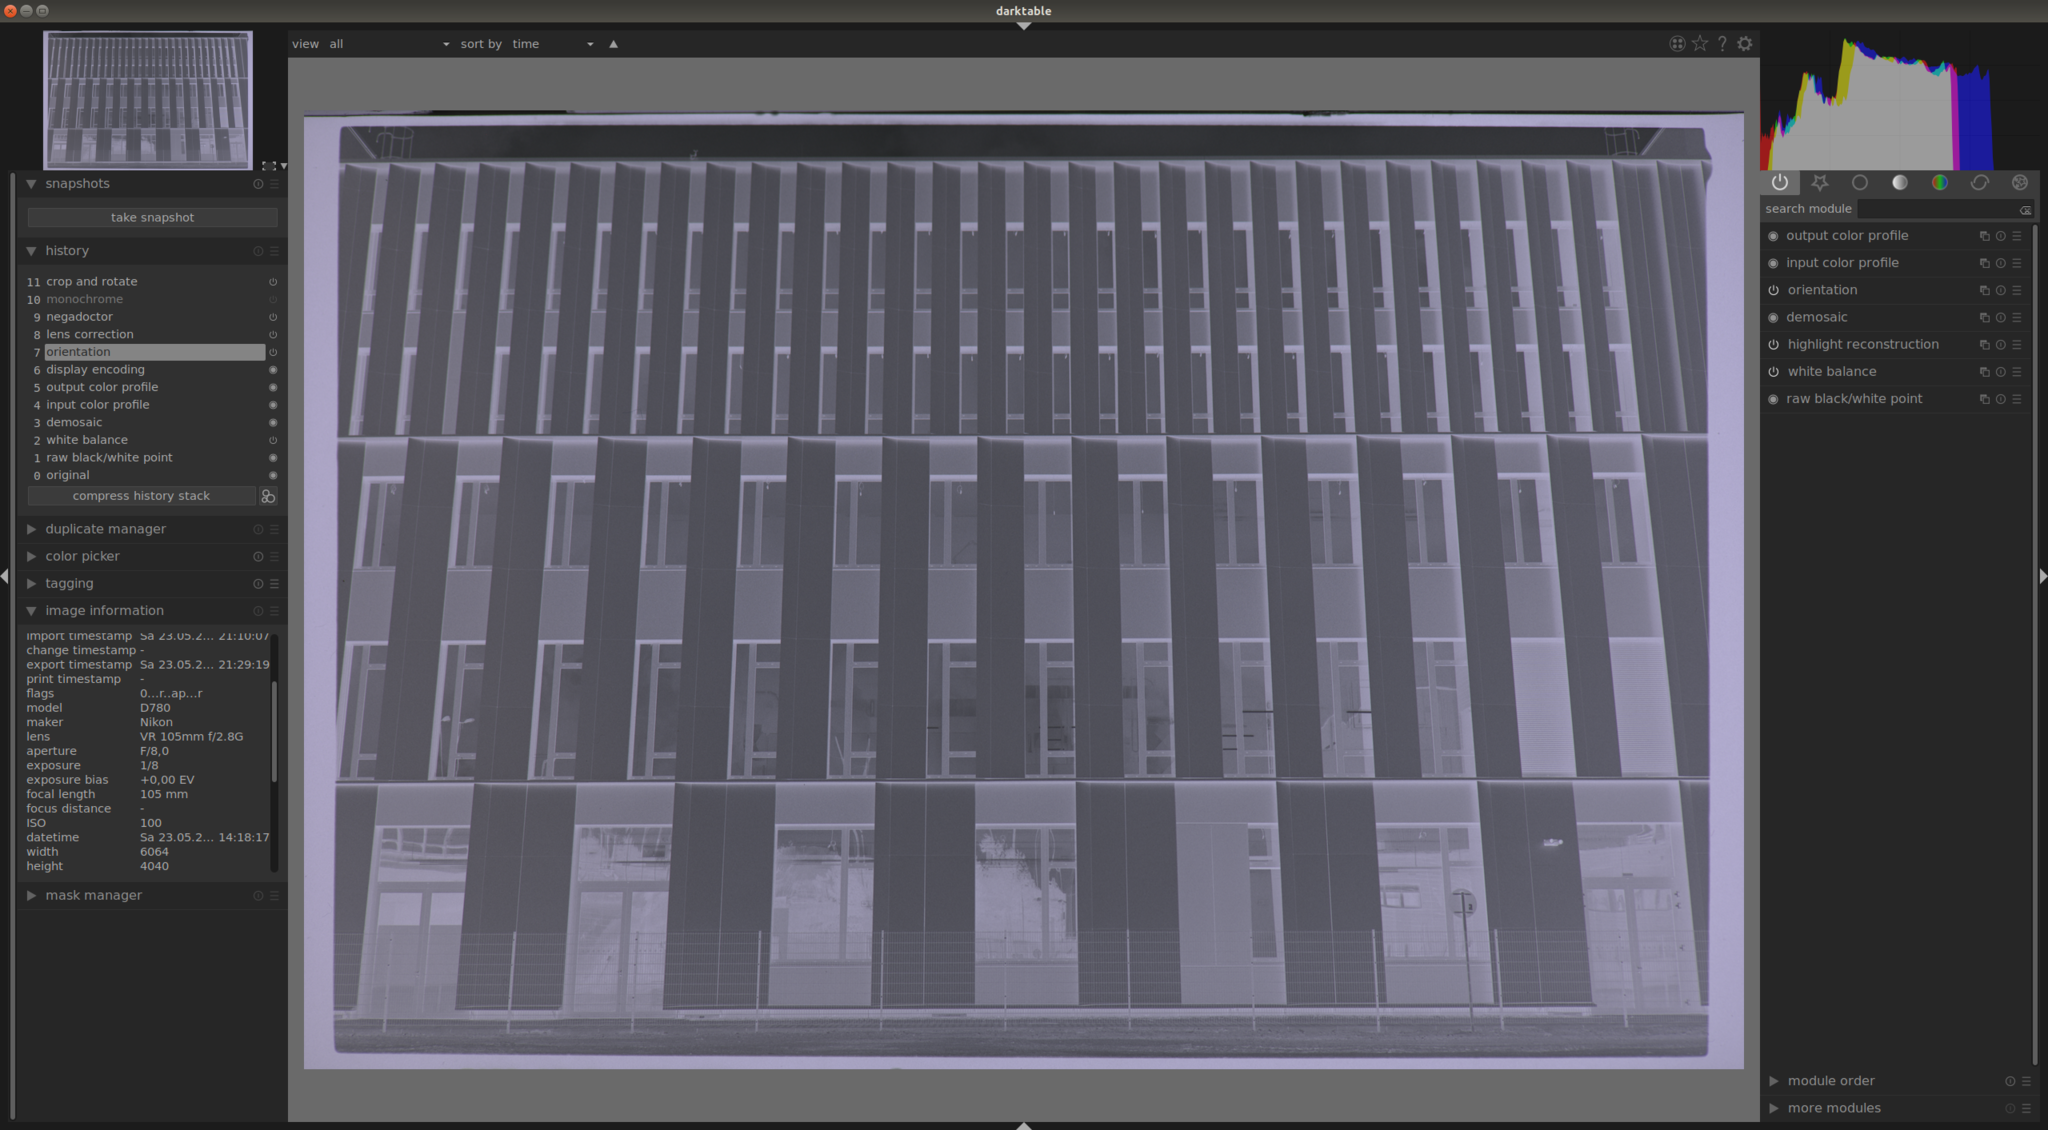
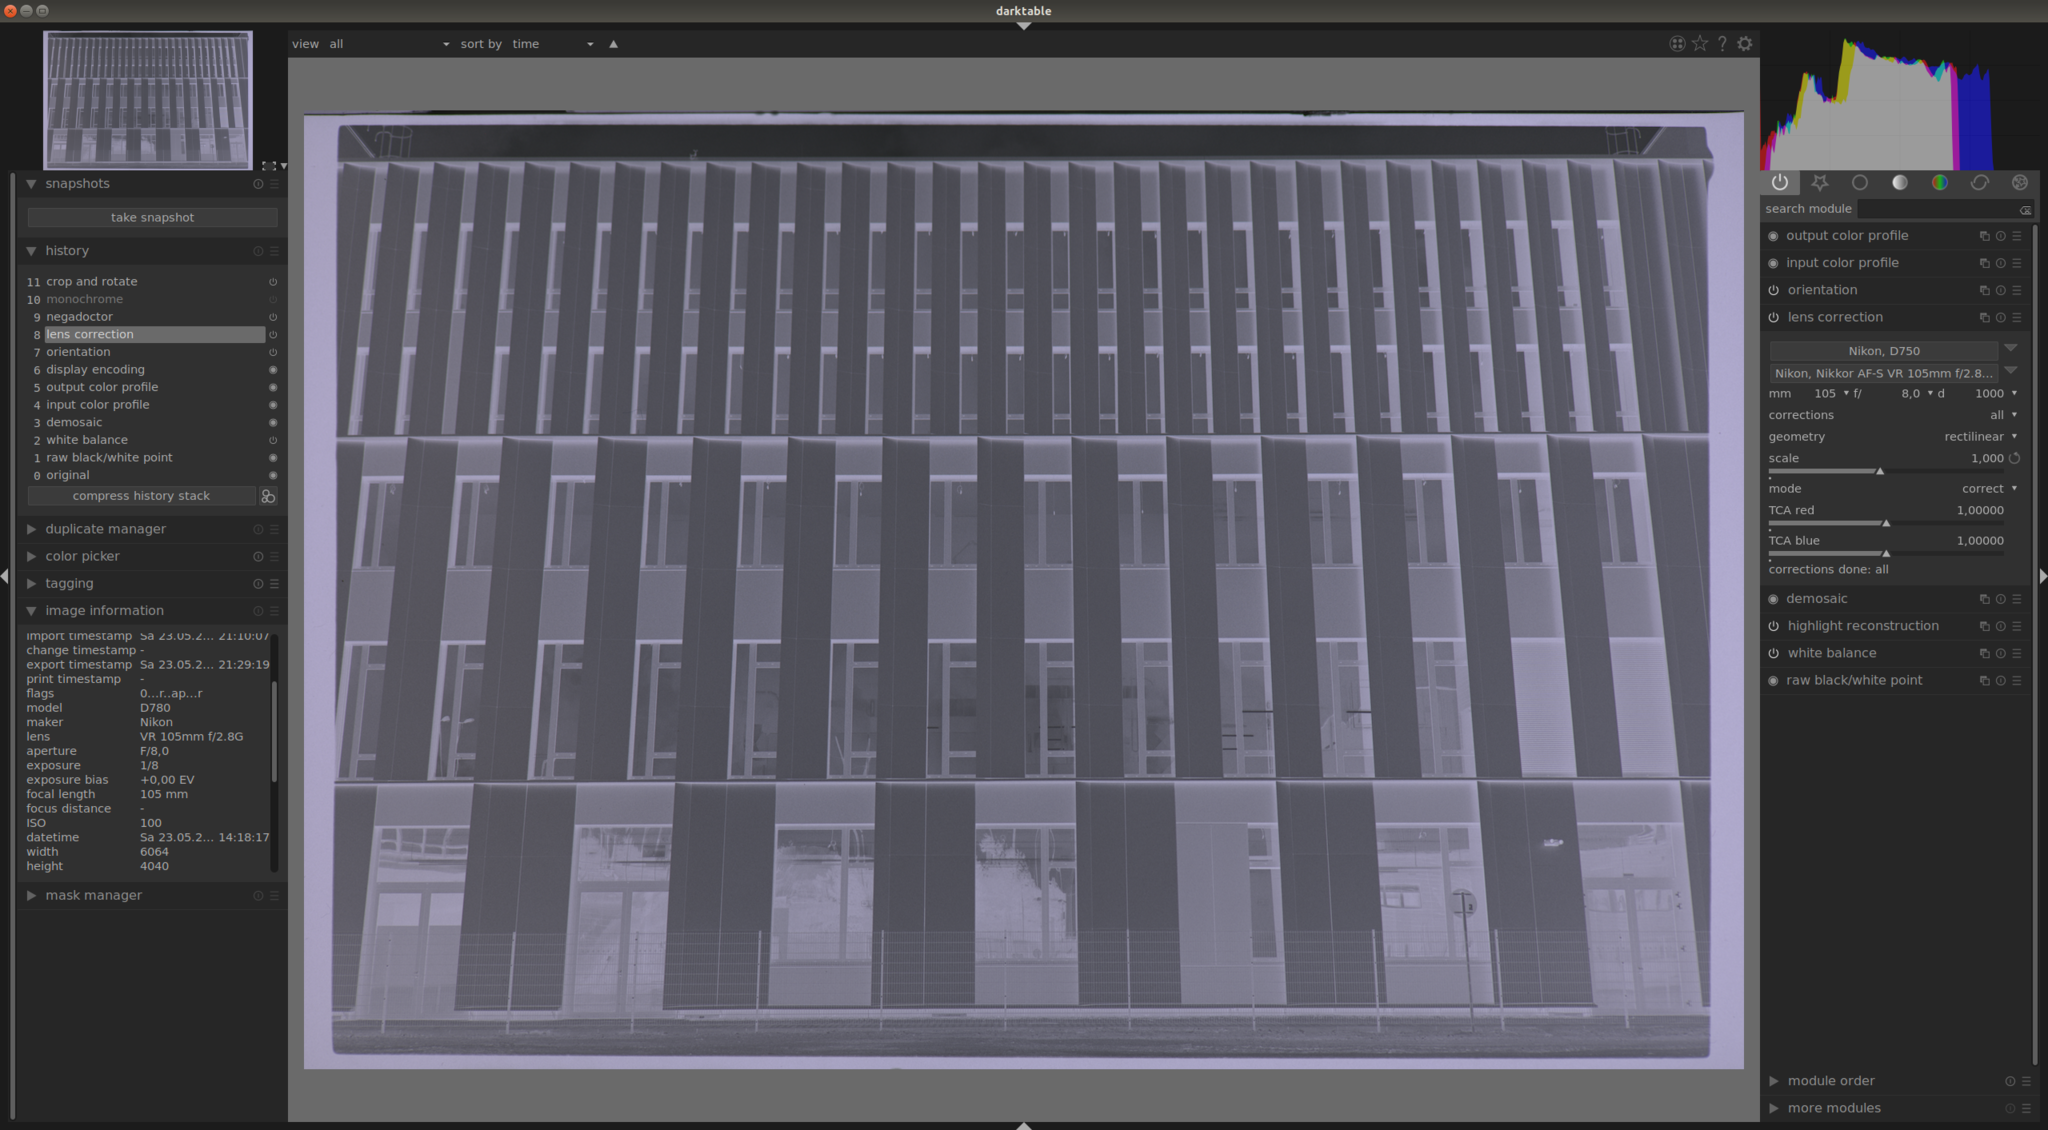
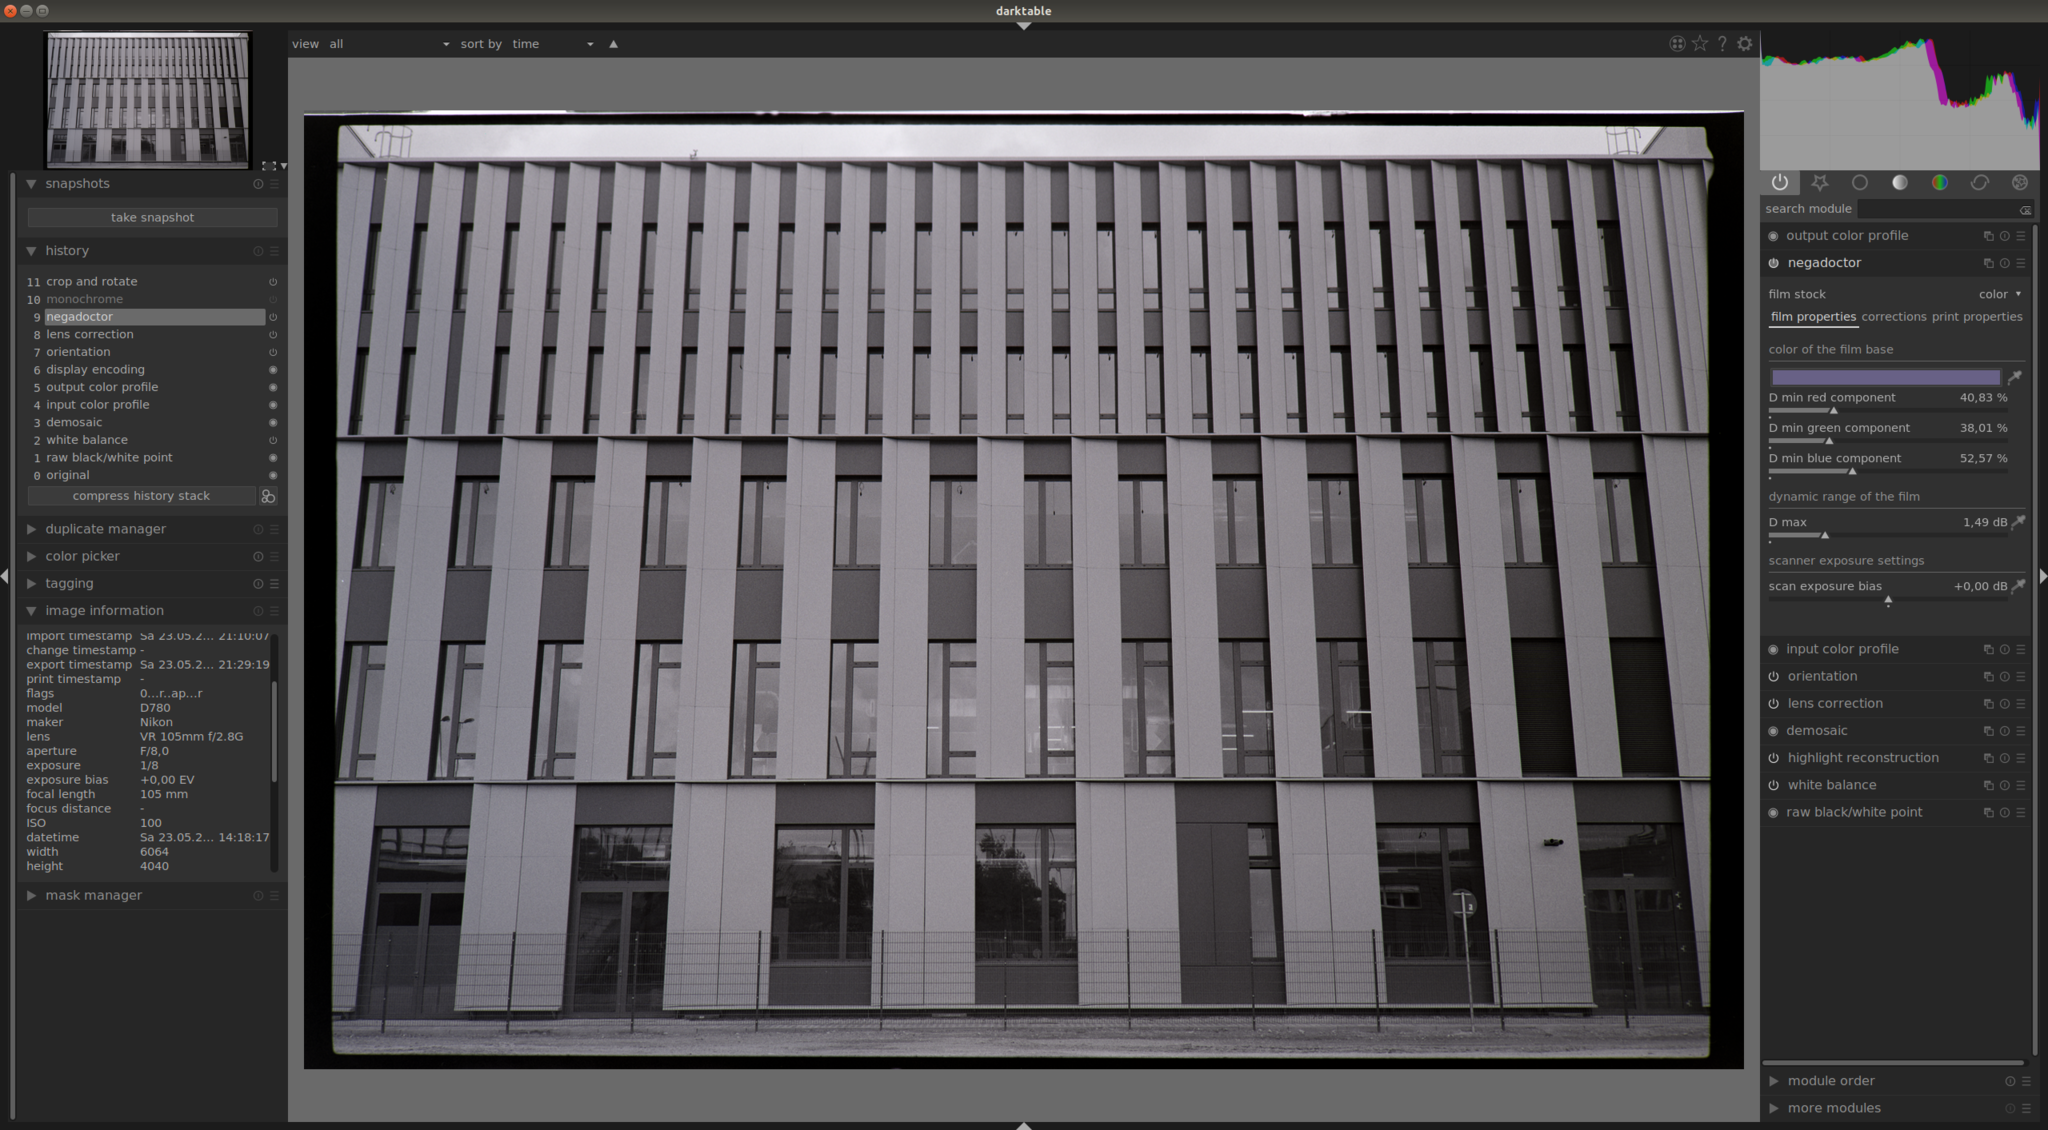
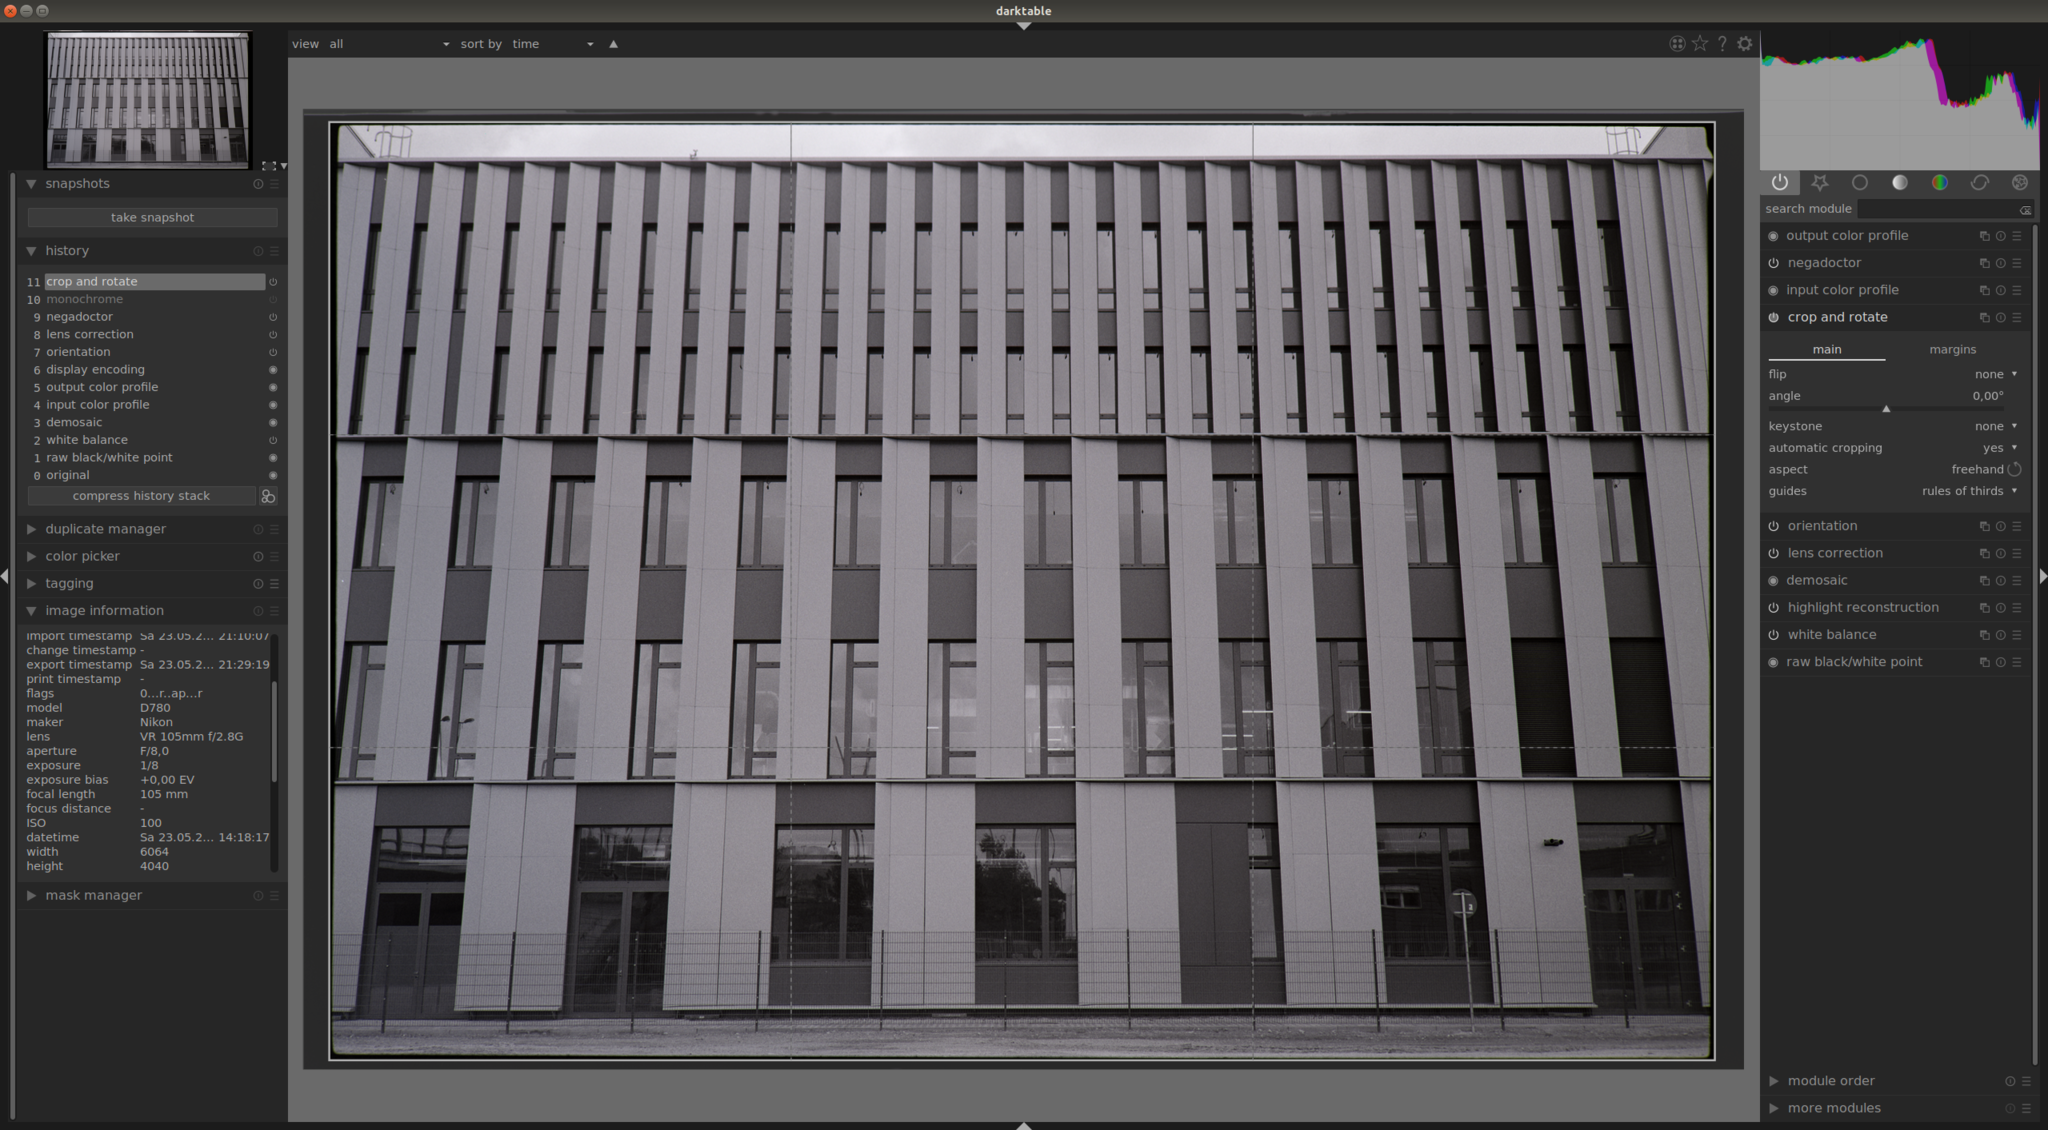
the pre-processing steps in darktable are shown in the following screenshots. the first screenshot [1.1] shows an unedited negative. the first step is to remove the optical distortion which is brought by the lens used for digitalization [1.2]. the second editing step [1.3] is not mandatory but it is nicer to convert the negative into a black and white image and to work with it later in hugin. last step is to crop the already “perfectly” aligned negative to its minimal size [1.4]. a perspective correction should not be needed any more. export and load the image afterwards with hugin and calibration can start!
lens calibration with hugin
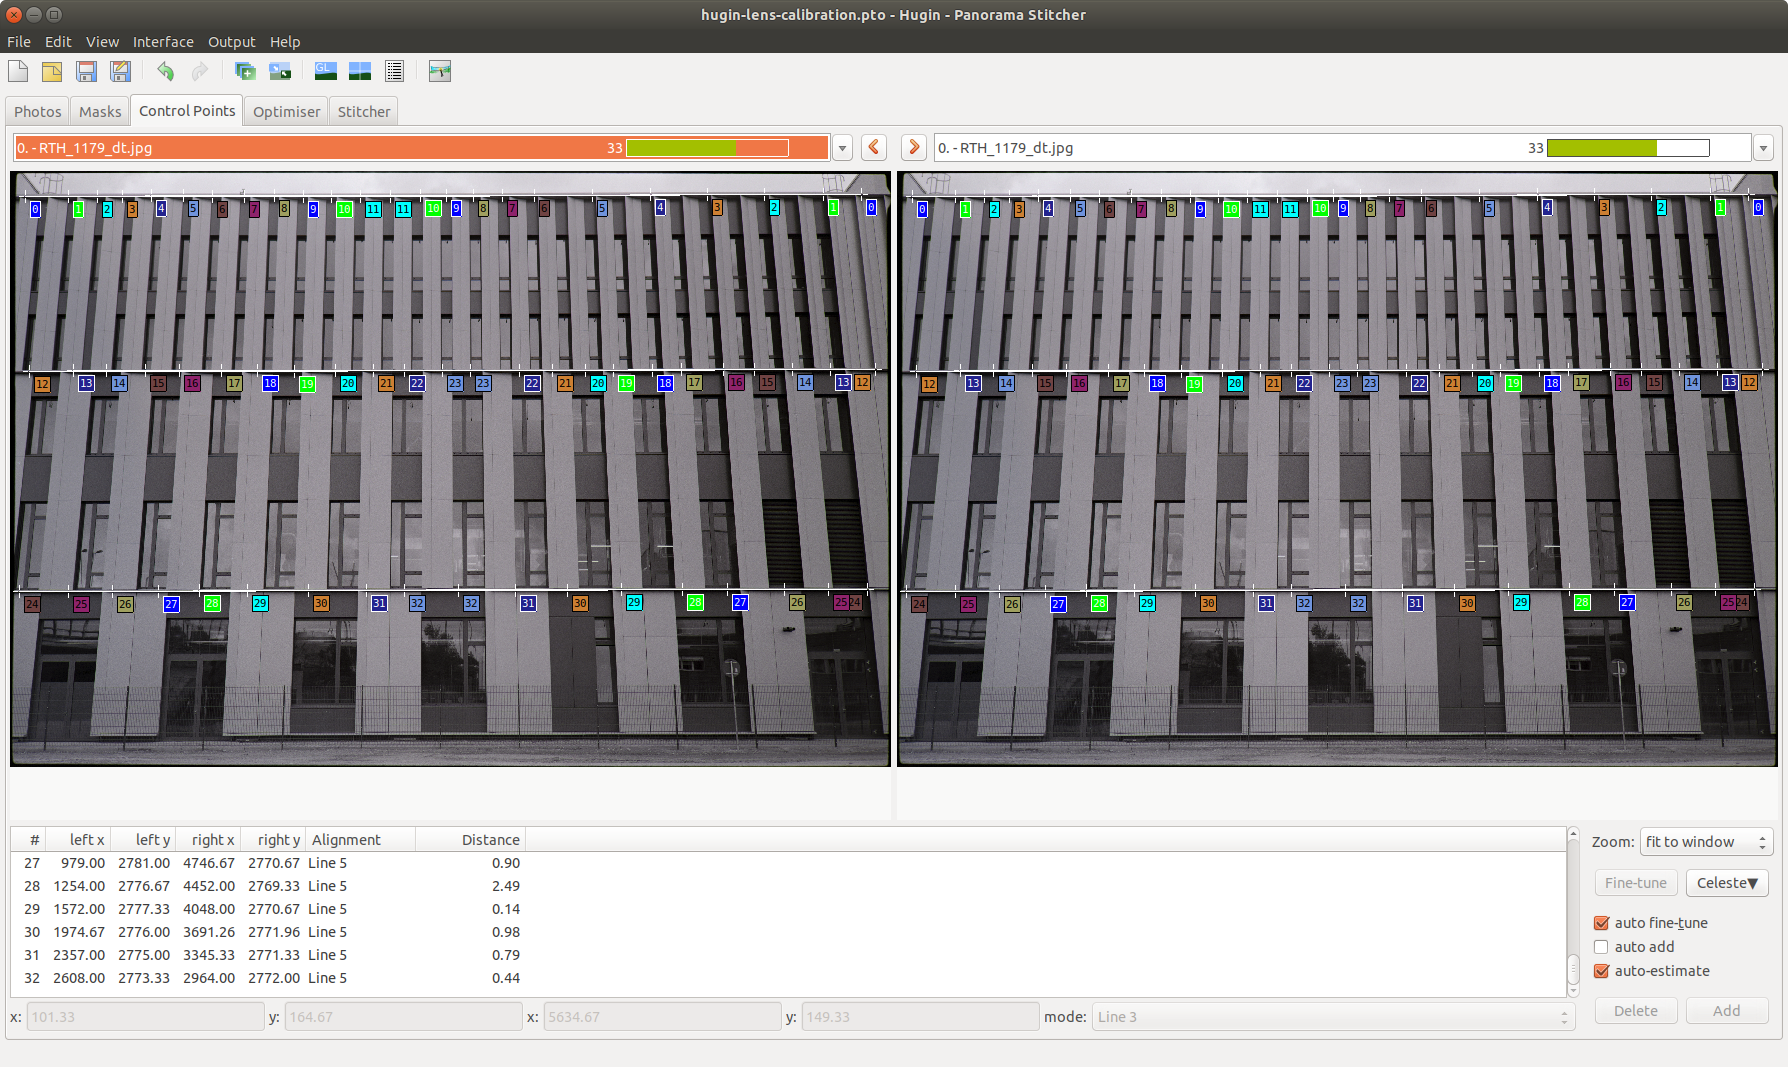
the actual lens calibration in hugin has a little work but it is straight forward. as already mentioned at least two straight lines need to show up on the negative. these lines are now used for the calibration. if not already done the interface should be switch from simple to either advanced or expert.
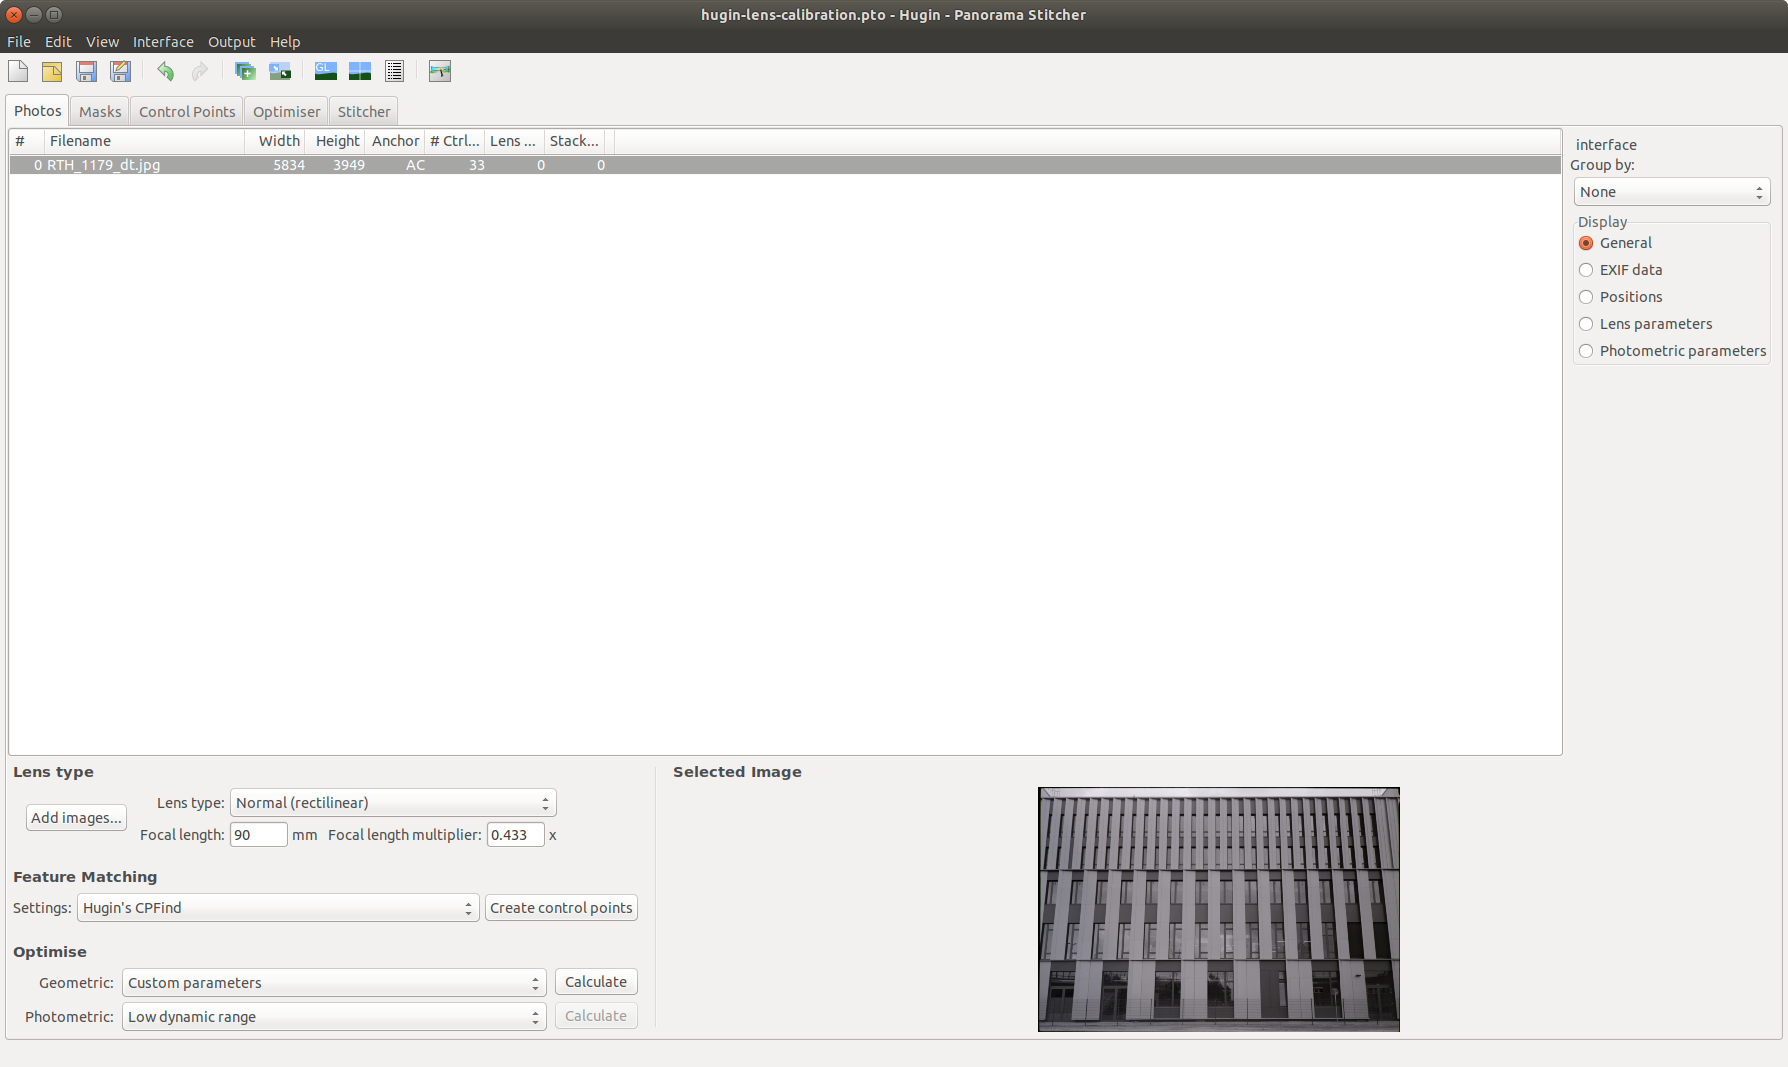
- load image [2.1]
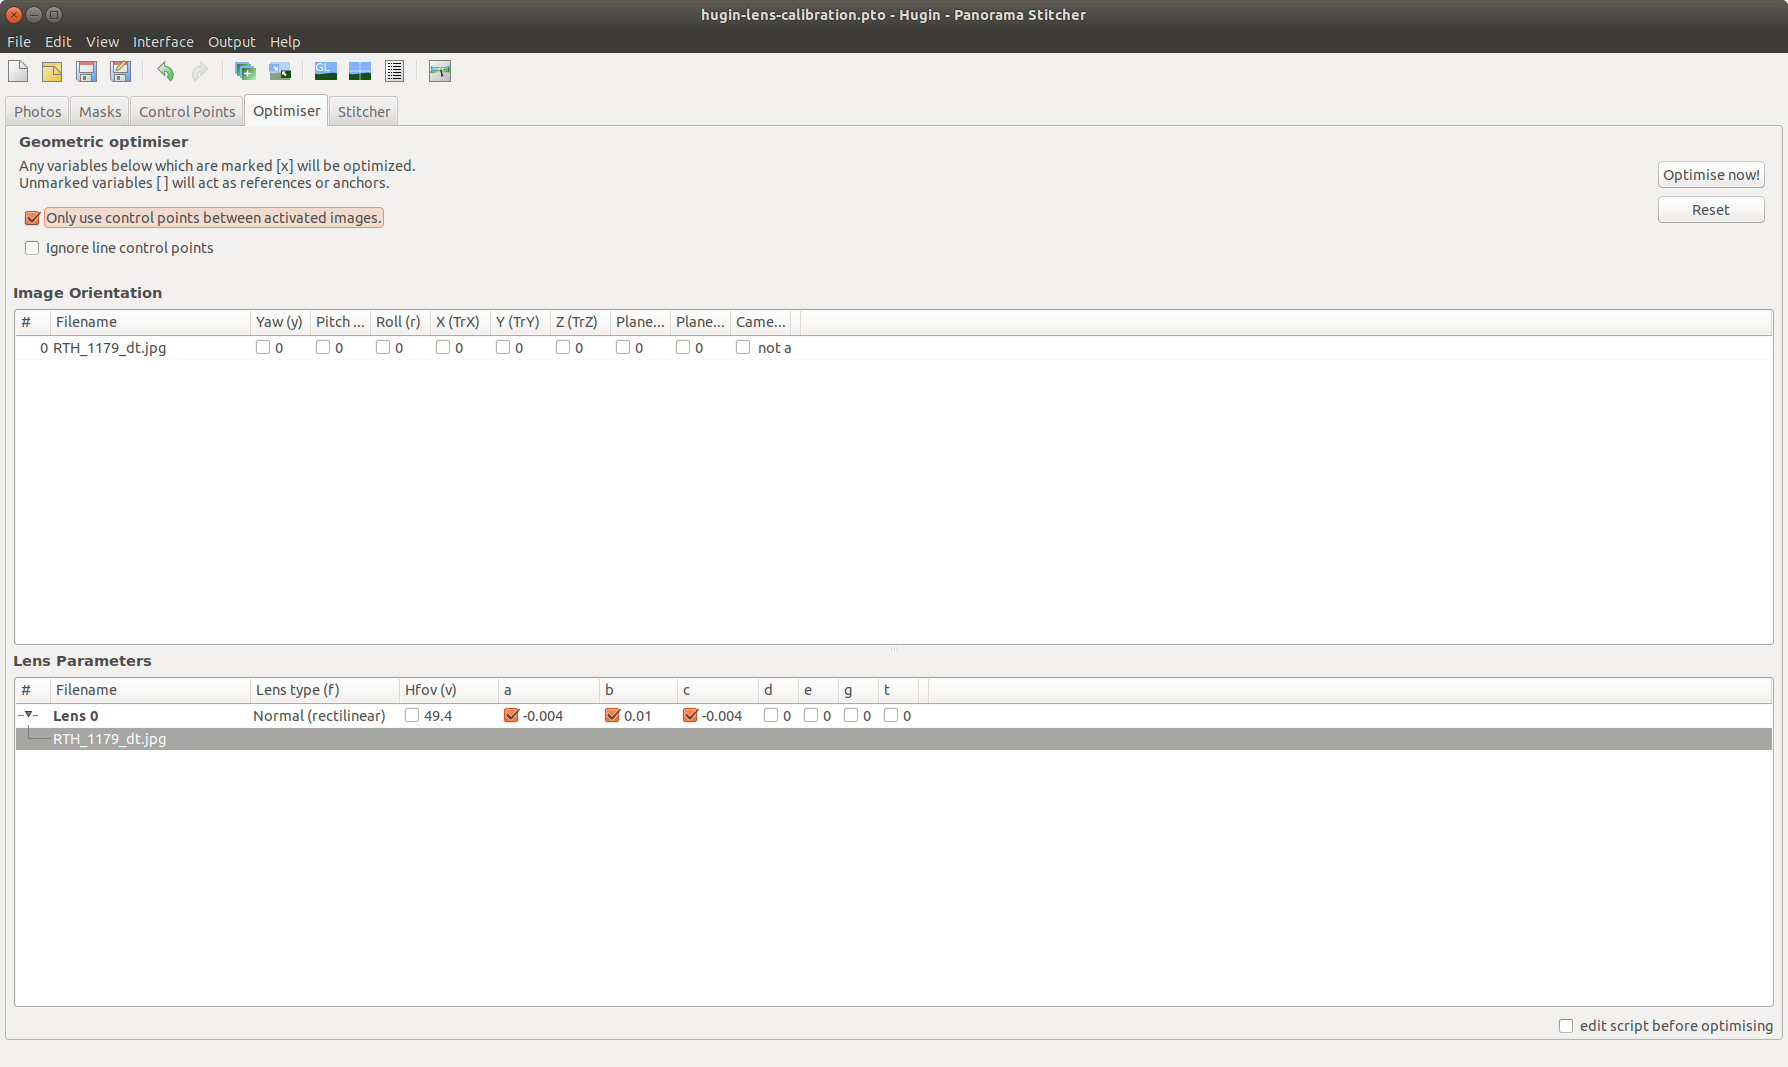
in the first tab the pre-processed image can be loaded into hugin. on this tab some settings needs to be changed as listed in the table. for instance, the focal length is read from the EXIF data which actually comes from the digital camera the image was taken with. means – focal length and multiplier needs to be set according to the camera and lens that took the negative. setting the geometric option to “custom parameters” opens another tab called “optimizer”. at the beginning the shown radial distortion values should be all zero - edit masks [2.2]
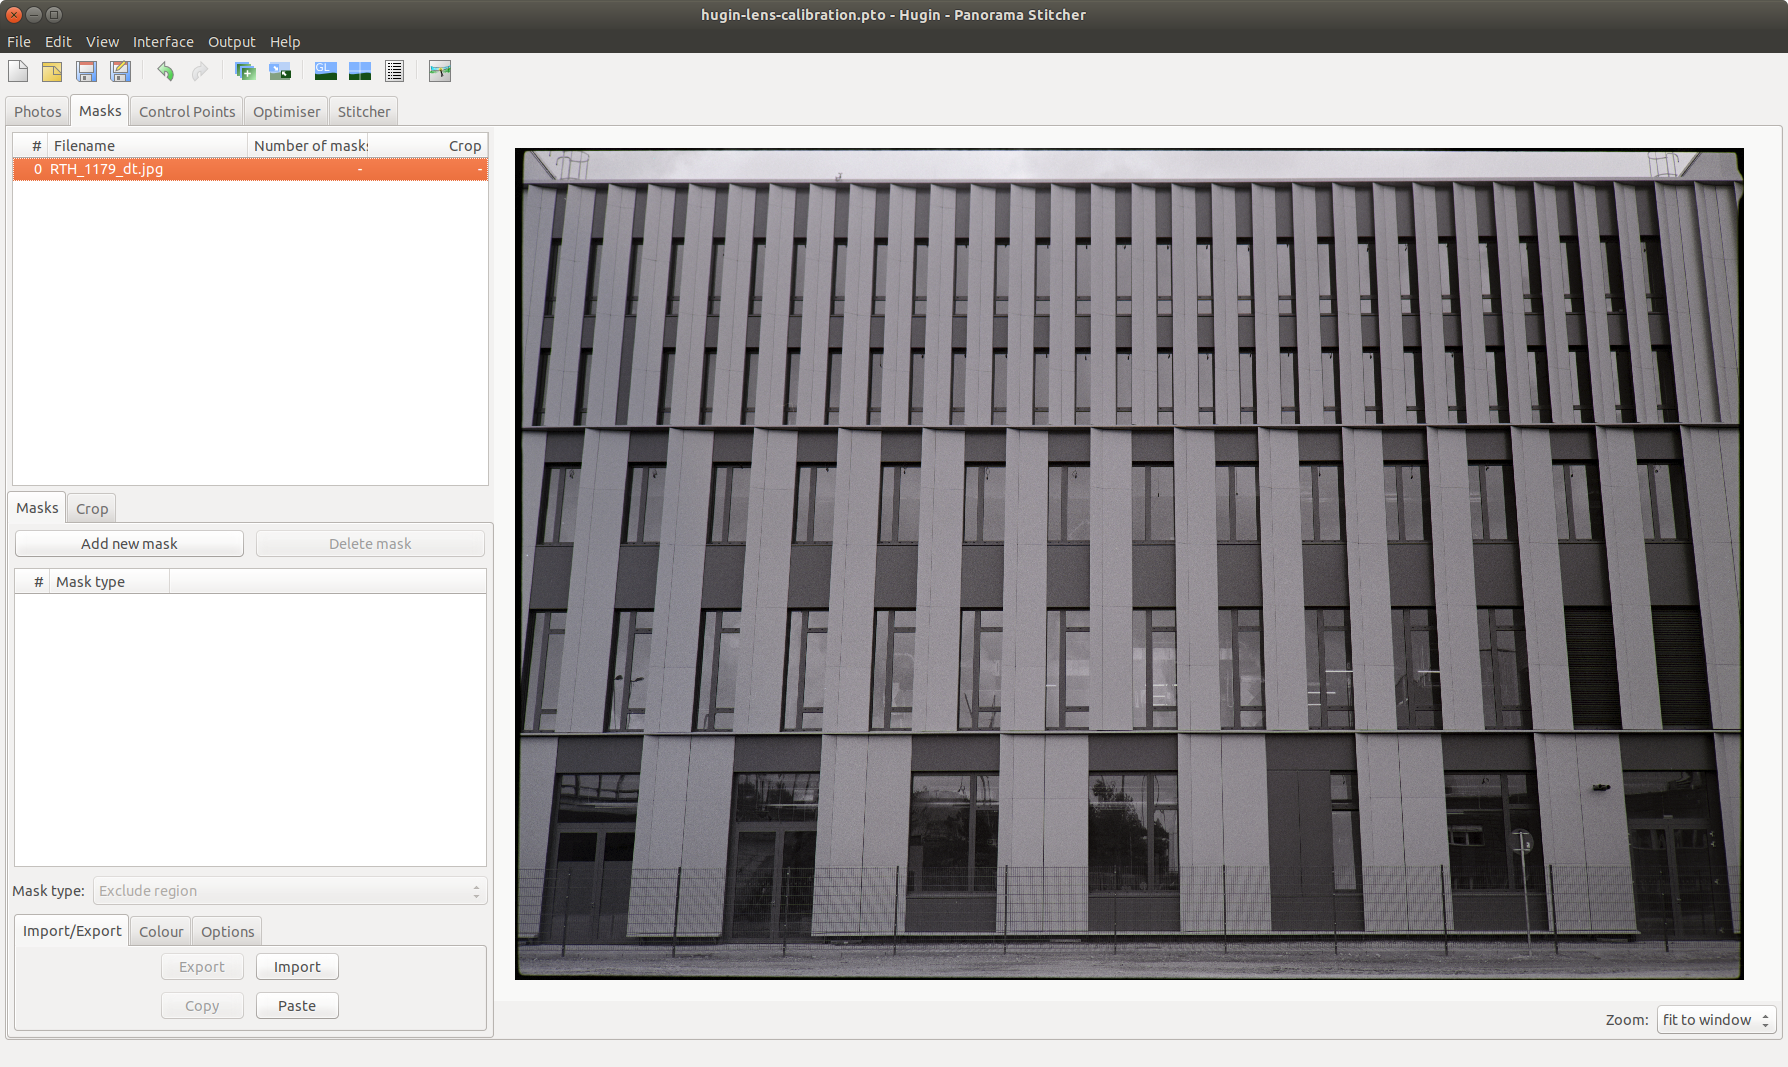
this tab can be skipped, nothing needs to be done here - set control points [2.3]
this step is the most important one. in this tab we add several control points on each straight line. hugin can than calculate the correction values accordingly. each control point is a pair of two points and are set together accurate onto the same line. for example, you could start with a pair on the outsides and meet in the middle. the next pair can be set by clicking on the add button. be aware that each line needs to have its own “mode name” (e.g. Line 3, Line 4, Line 5, …). after placing the first point select for mode “New line” to change the mode name. the hugin screenshot shows here 3 lines with control points. it was used to compare the result against only using 2 lines - stitcher configuration [2.4]
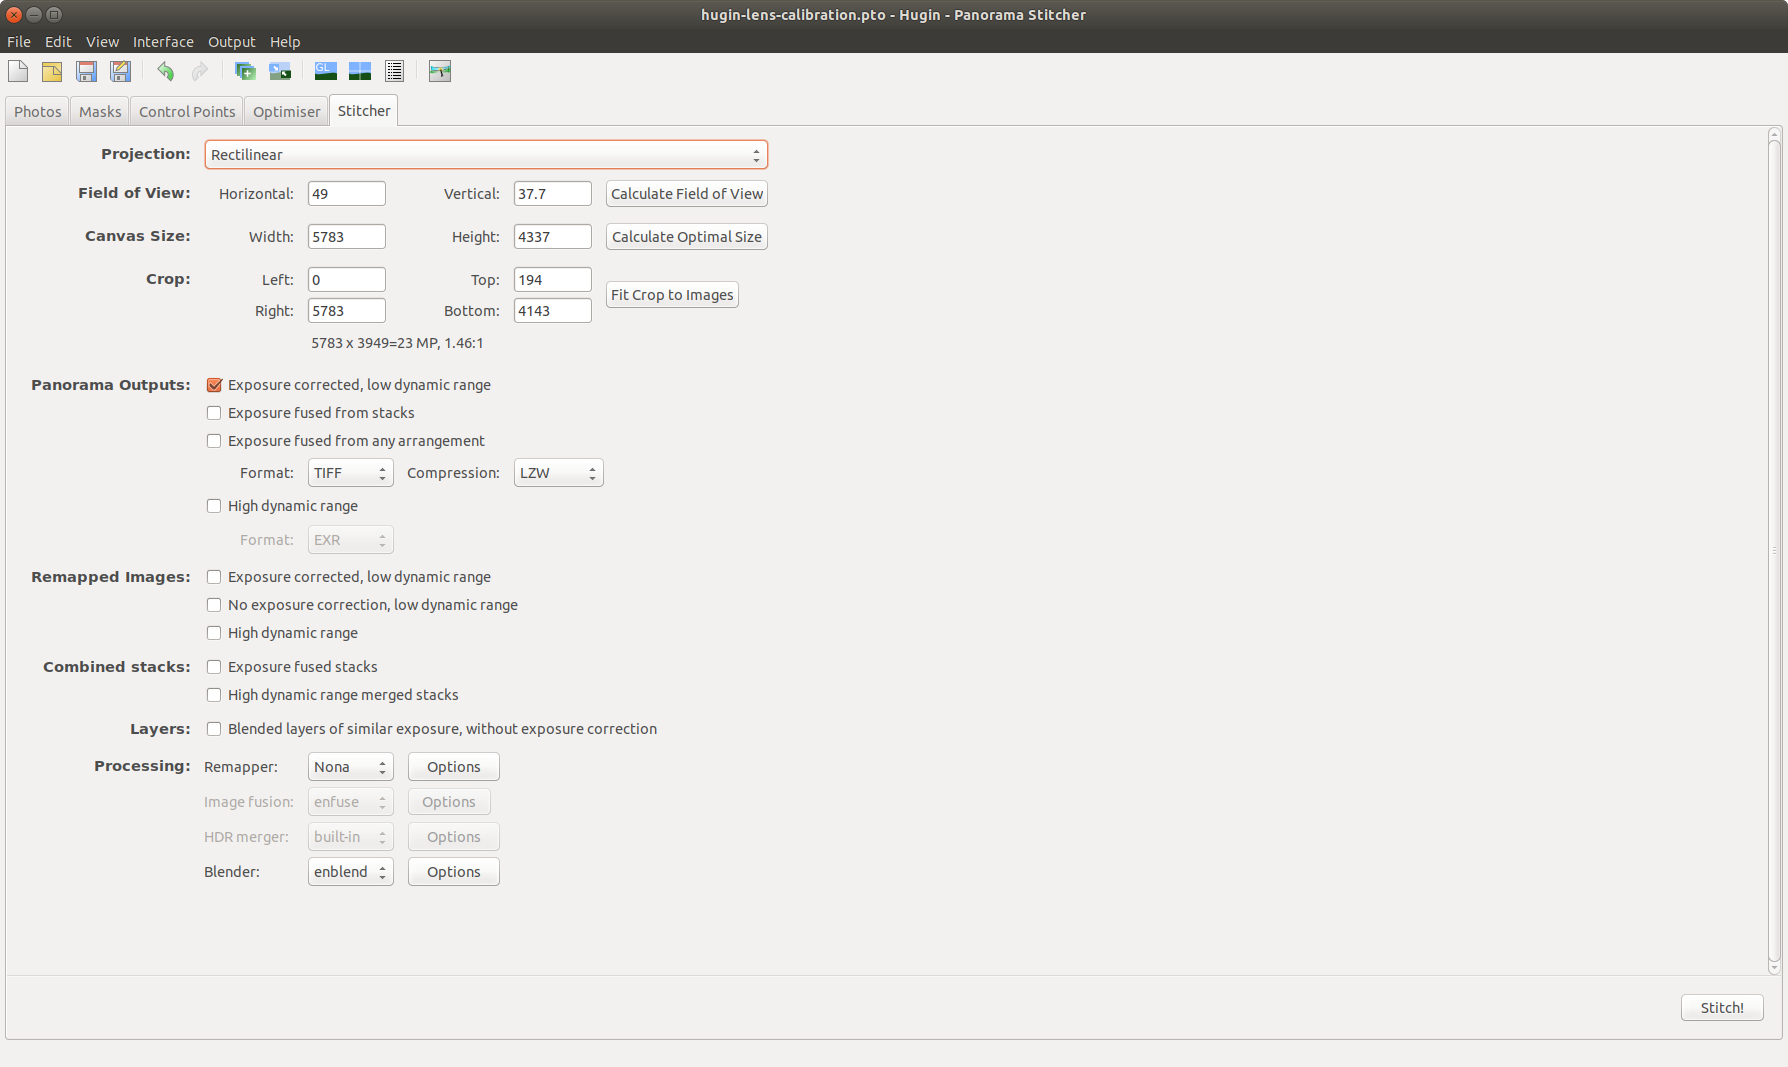
here it is important to set the project to rectilinear - set lens parameters [2.5]
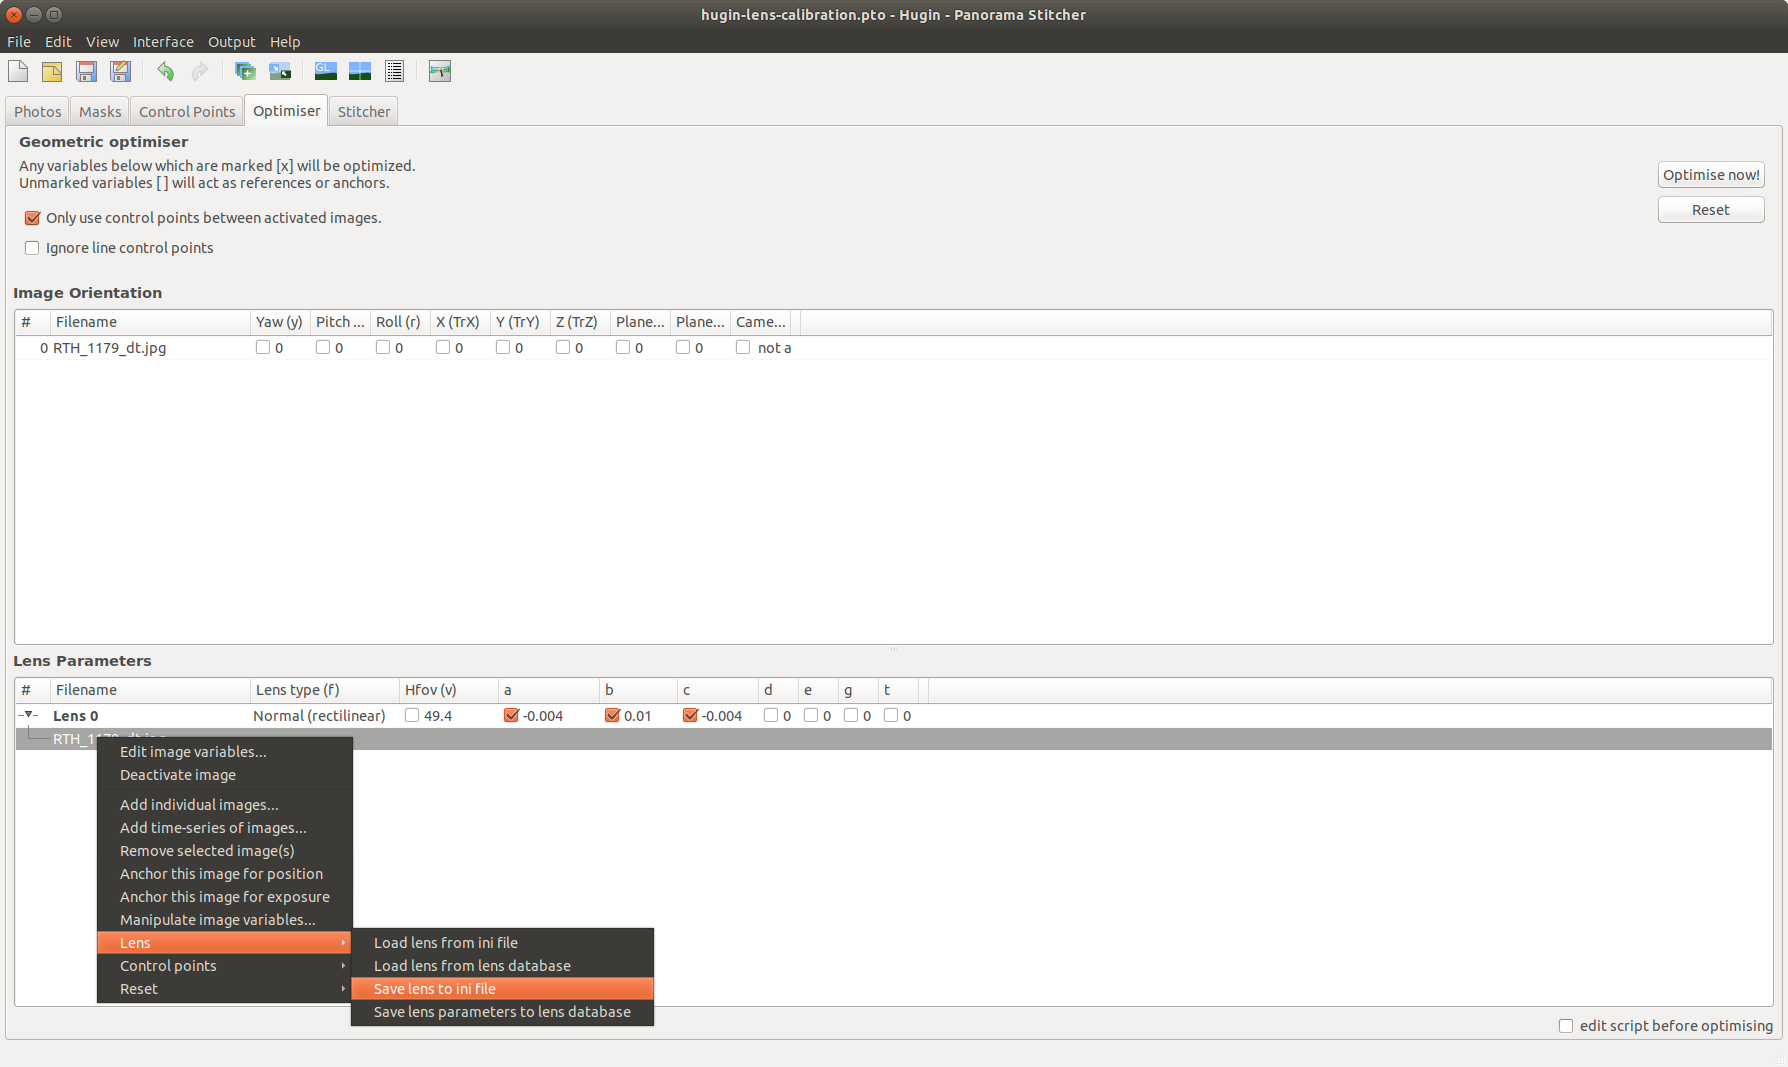
if all lines are set, hugin is now ready to calculate the distortion correction values. before calculating the radial distortion parameters A, B and C needs to be enabled. they can be found in the optimizer tab. by pressing the button “optimize now!“ these parameters are calculated by hugin - save results [2.6]
if the calculated values are acceptable, the last step in hugin is to save them as .ini file.
the lens calibration is done but not yet in the lensfun library and therefore not available for software using the library!
| display | lens parameters |
| lens type | normal (rectilinear) |
| focal length | 90mm // Fuji GW690III |
| f.l. multiplier | 0.433 (medium format) |
| geometric | custom parameters |
| projection | rectilinear |
own lensfun library profiles can be stored under the linux (e.g. ubuntu) home folder tree. if lensfun is already installed and used there should be a folder named ~/.local/share/lensfun. lensfun updates by the way are stored here as well (an update can be initiated with the linux command /usr/bin/lensfun-update-data). this folder should also contain several sub folders with xml files, at least after an update. calibration profiles for a huge amount of cameras and lenses are stored within them.
due to, the Fuji GW690 III is not yet in the database it makes sense to store its calibration profile in a dedicated xml file. an existing file might serve as a template.
below is shown the ini file generated by hugin and an example xml calibration profile for the Fuji GW690 III. the radial distortion correction values need to be copied from the ini file (A, B and C) to the xml profile and stored in the lensfun configuration folder. if this is done the Fuji GW690 III profile is now ready for use!
- hugin > ini file
[Lens]
image_width=5834
image_height=3949
type=0
hfov=49.3776
hfov_link=0
crop=0.433
a=-0.00379804
a_link=0
b=0.0103031
b_link=0
c=-0.00355684
c_link=0
...
[Lens/crop]
...
[EXIF]
CameraMake=NIKON CORPORATION
...
CropFactor=0.433
...
- lensfun > Fuji GW690 III profile
<lensdatabase version="1">
    <camera>
        <maker>FUJIFILM</maker>
        <model>GW690 III</model>
        <mount>fujifilmGW690III</mount>
        <cropfactor>0.433</cropfactor>
    </camera>
    <lens>
        <maker>FUJIFILM</maker>
        <model>FUJIFILM GW690 III & compatibles</model>
        <model lang="en">fixed lens</model>
        <model lang="de">festes Objektiv</model>
        <mount>fujifilmGW690III</mount>
        <cropfactor>0.433</cropfactor>
        <aspect-ratio>3:2</aspect-ratio>
        <calibration>
            <distortion model="ptlens" focal="90.0" a="-0.00379804" b="0.0103031" c="-0.00355684"/>
        </calibration>
    </lens>
</lensdatabase>
comparison – before and after calibration
the verification of the new lens profile can be easily done with darktable. the first exported image from darktable can now re-opened and the new profile can be selected in the lens correction module and applied.
as mentioned above it was a try to use three lines for calibration. the animated images switches between none applied profile and these two different profiles. visually is no difference between a two and three line calibration recognizable.
as the images show the calibration profile can be applied and corrects the original Fuji GW690 III lens distortion perfectly. but another question is, whether it corrects the distortion as good as it does here as for other negatives shot by the same camera!?


conclusion
if film negatives should be used for a digital post-processing and lenses have an optical distortion you want to remove, a calibration profile needs to be applied in software. the good is, a lens calibration of analogous equipment is technically not a big issue. calibration software exists and is easy to use. moreover, hardware helping to get a correct aligned image from a negative exists as well. but lens calibration of analogues camera equipment doesn’t work as good as for an end-to-end digital system.
the calibration process for an digital camera system is more simple. the taken image (doesn’t matter if it’s jpg or raw) don’t need to be aligned – each pixel is on the same position on each image – every time. furthermore, each produced digital camera of the same type provides standardized exif metadata, so that image editing software can easily recognize type and settings.
for a an analogous camera system it is different. first point – it can not hundred percent guaranteed that each negative ends-up same aligned in the digital process chain. each time a negative is digitalized (and it doesn’t matter whether it is done by film scanner or digital camera), the cut-out will differ. due to this, it makes the calibration process a lot more complex and time consuming. second point – analogous cameras doesn’t provide any exif metadata. software is not able to recognize the camera and lens types. but this issue can be avoided by either manual selection or adding the missing exif information after the digitalization process. for example the exiv2 utility would help. but just to mention, there is no standardisation in naming camera and lens – types and settings. there is a risk that everybody gives if only slightly different names which will prevent an automatic selection of the correct profile.
⋆ so what does it meant for adding analogous profiles to lensfun? ⋆
in my pinion and for the reason of the first point, lensfun profiles for analogous camera systems should not be added. it can not be guaranteed, that the negative cut-out will be the same as done during the lens calibration. the process is not 100% replicable or even 95% ; )
but nevertheless, for me personally i will continue calibrating my camera equipment in case lenses appear to have distortions. if it would be really that important the remove distortion from a certain image – of course it can be dedicated calibrated.
on the other hand, not each distortion will look to bad or is visible on pictures … 8)