… or the actual question is: “cinestill cs41 powder kit developer, which already sits and waits since 5 months underneath my kitchen sink, … is it still good for use?” and “how could i test and proof whether it can be used again?”
these were the questions i asked myself a while ago, as i wanted to develop a next bunch of color negatives. still there was the cinestill cs41 powder kit developer under my sink. i knew that the speck says 24 films in total should be ok to be developed. on top, it was the first c41 chemicals ever that i mixed together. no experience with it. i already developed some films in this dilution. a few additional more should be ok. but the developer was stored already five months under the sink. indeed, stored in complete darkness, but … for how long might these developer be stored? … and how to test?

an idea of testing
every time when i develop black and white films, i generally check before whether the chemical is good for use. only once, maybe twice 🙂 i made the mistake not to test and my heart was bleeding a lot about the loss! just to say in short: for testing bw developer, i cut off a small piece from the film and drop a drip on it. let the developer sit on it as long as the receipt requires. after rinsing i put the snippet into the fixer. with that, i also know how the fixer behaves. if the film stripe shows then a deep dark spot on it, i know the developer is fine. since with color negatives it’s all about “colors”, just a fine contrasty spot might not be good enough judging the quality of a c41 developer. however, it wouldn’t tell anything about color shifts!
the idea now is to shot a complete roll of film with exactly the same scene. each time i’m not sure whether the chemicals are still good for use or might be expired, i would cut off one single frame from this test stripe and develop it first. throughout the complete process: from film development to digital processing with a computer. hopefully this allows to judge first the developer quality without destroying the actually film or getting unexpected results.
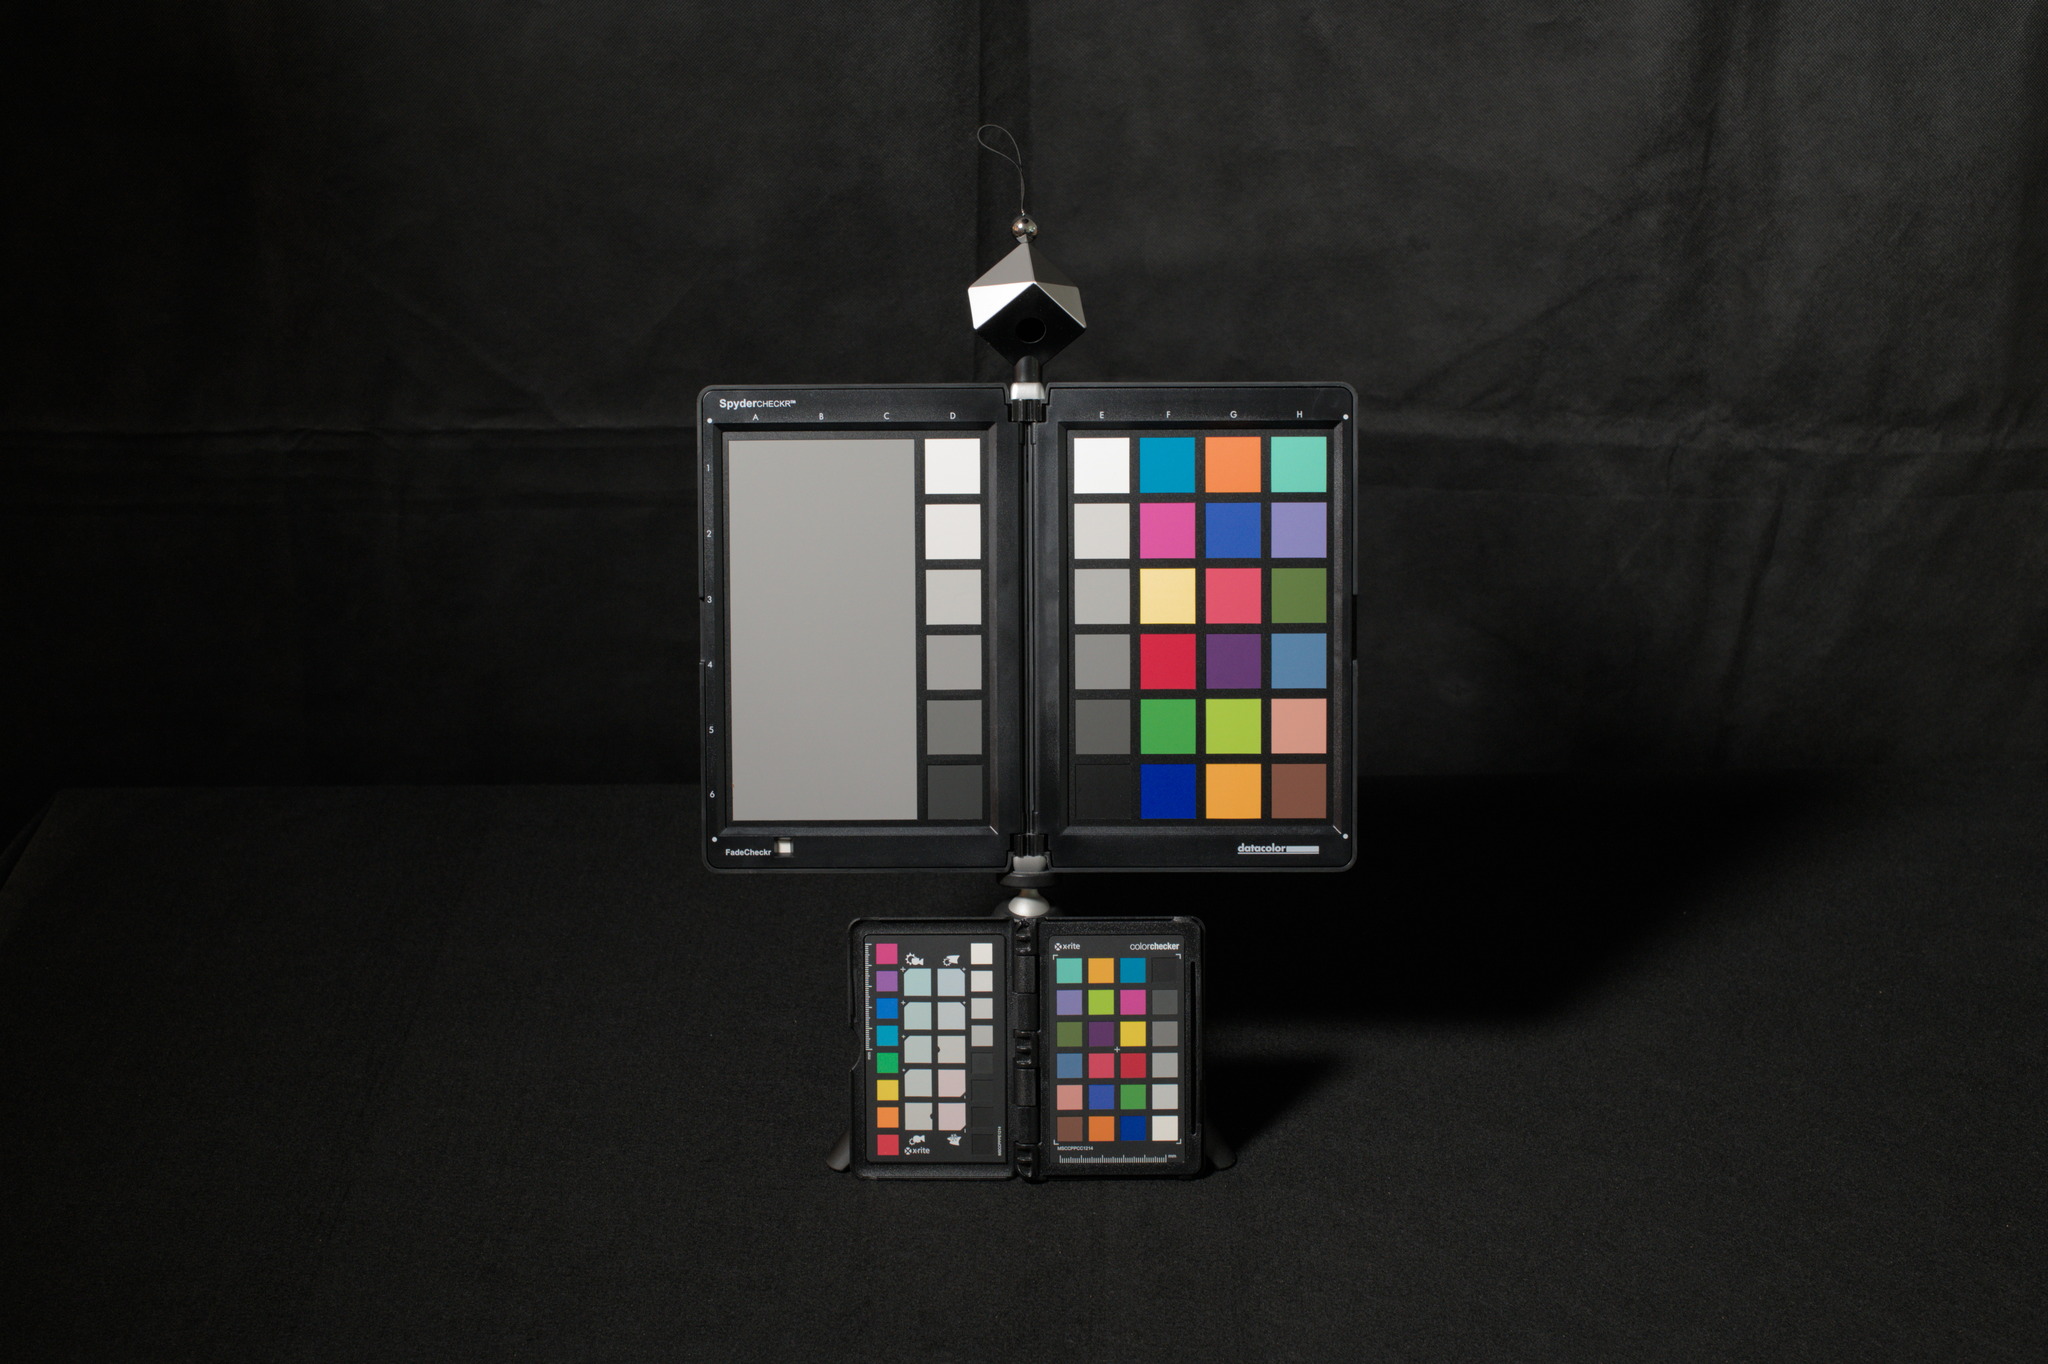
the test stripe for c41 developer
as the test stripe should be for color film, it makes totally sense to have colors on the frames. so, what else then a color target would be better to shot? a color target would also enable the control of colors throughout the complete process. means, from scanning the negative, to image editing on the computer, up to printing if needed. color management and color conversion is hereby controllable.
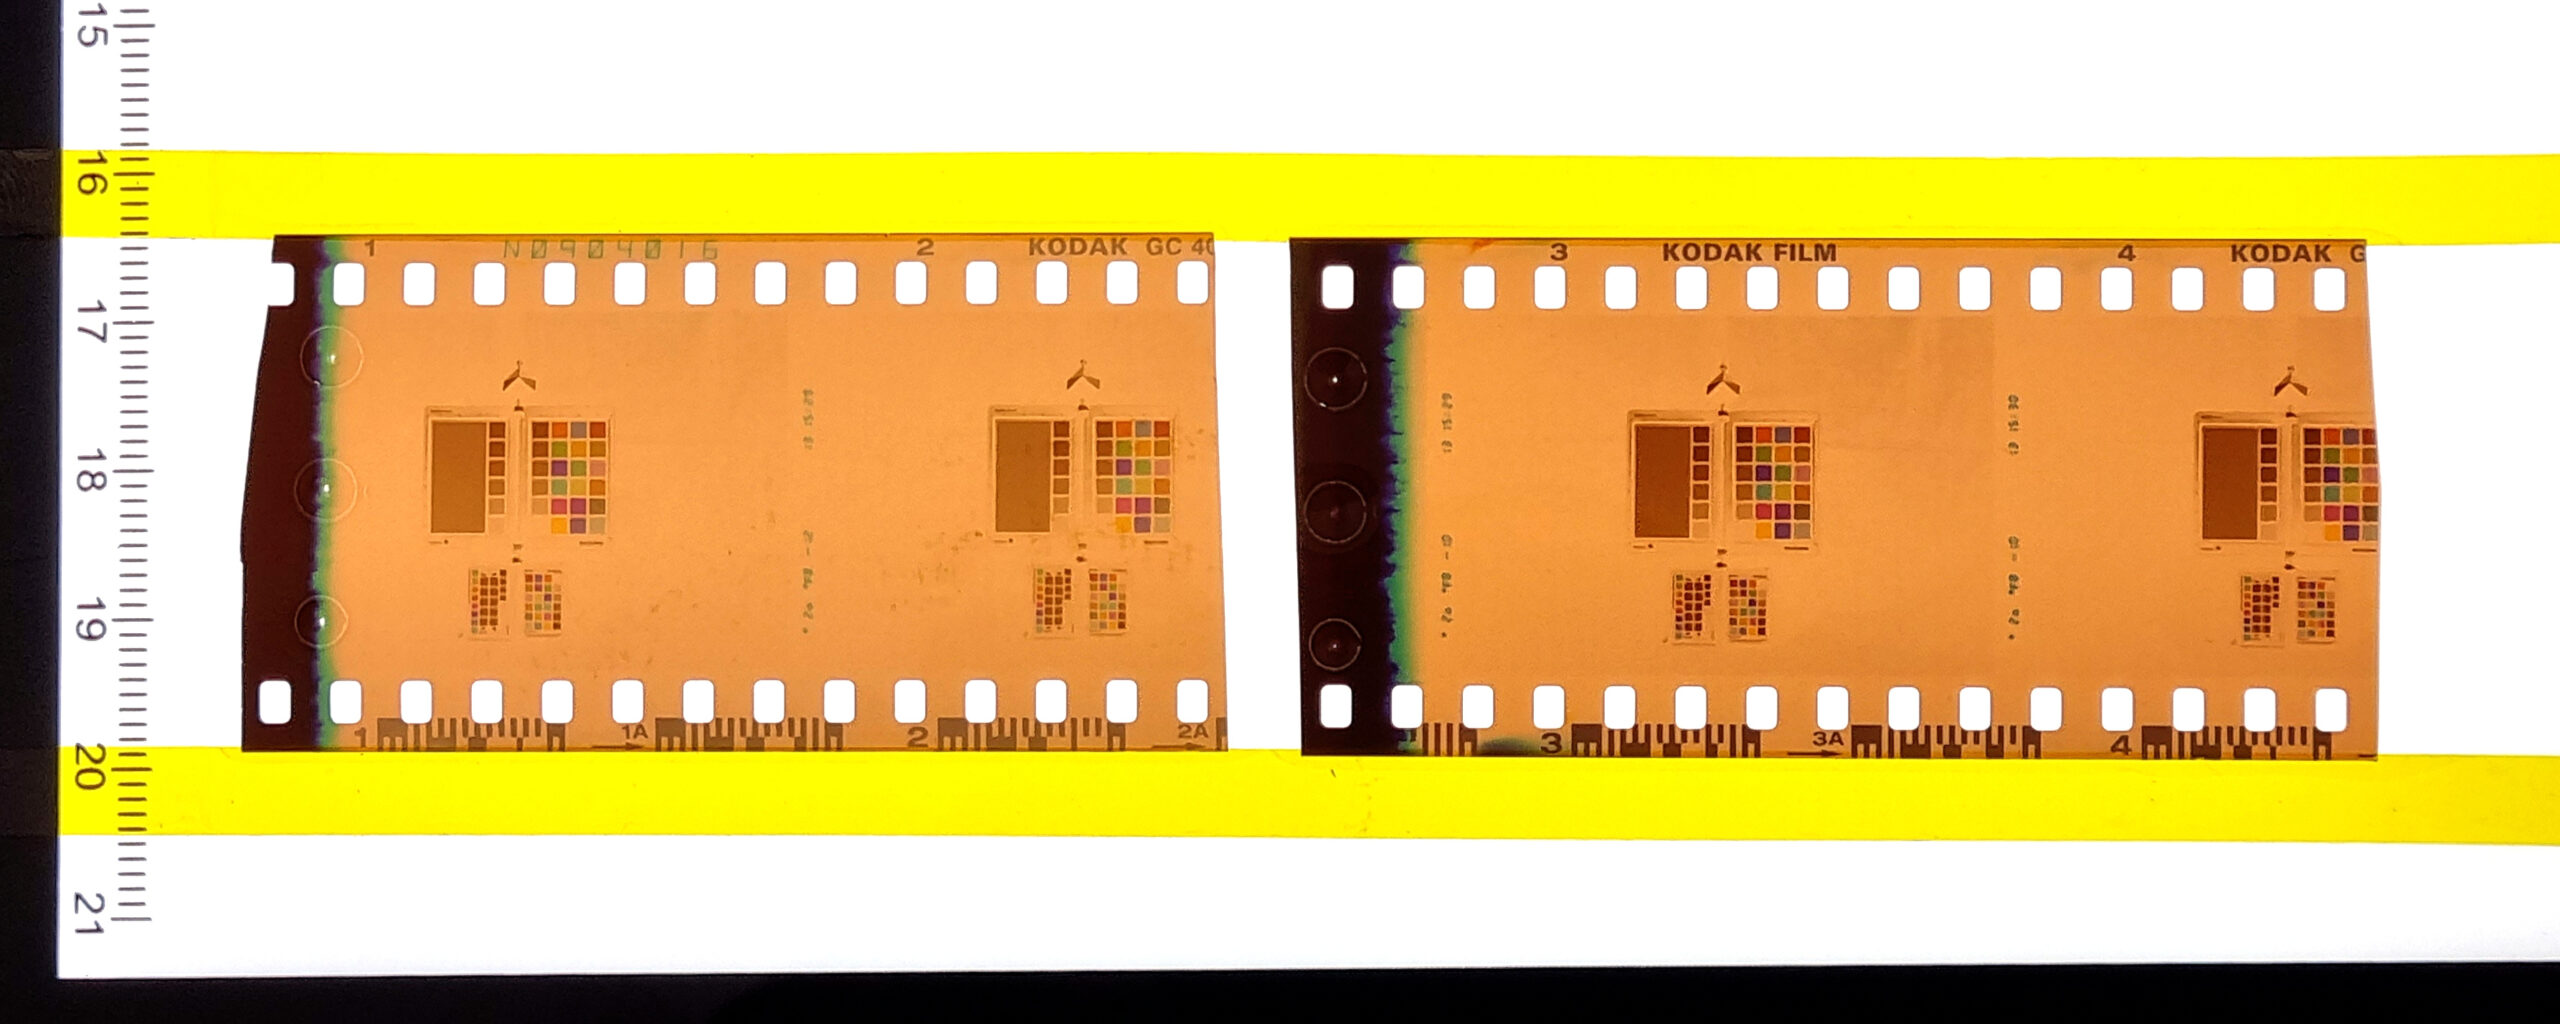
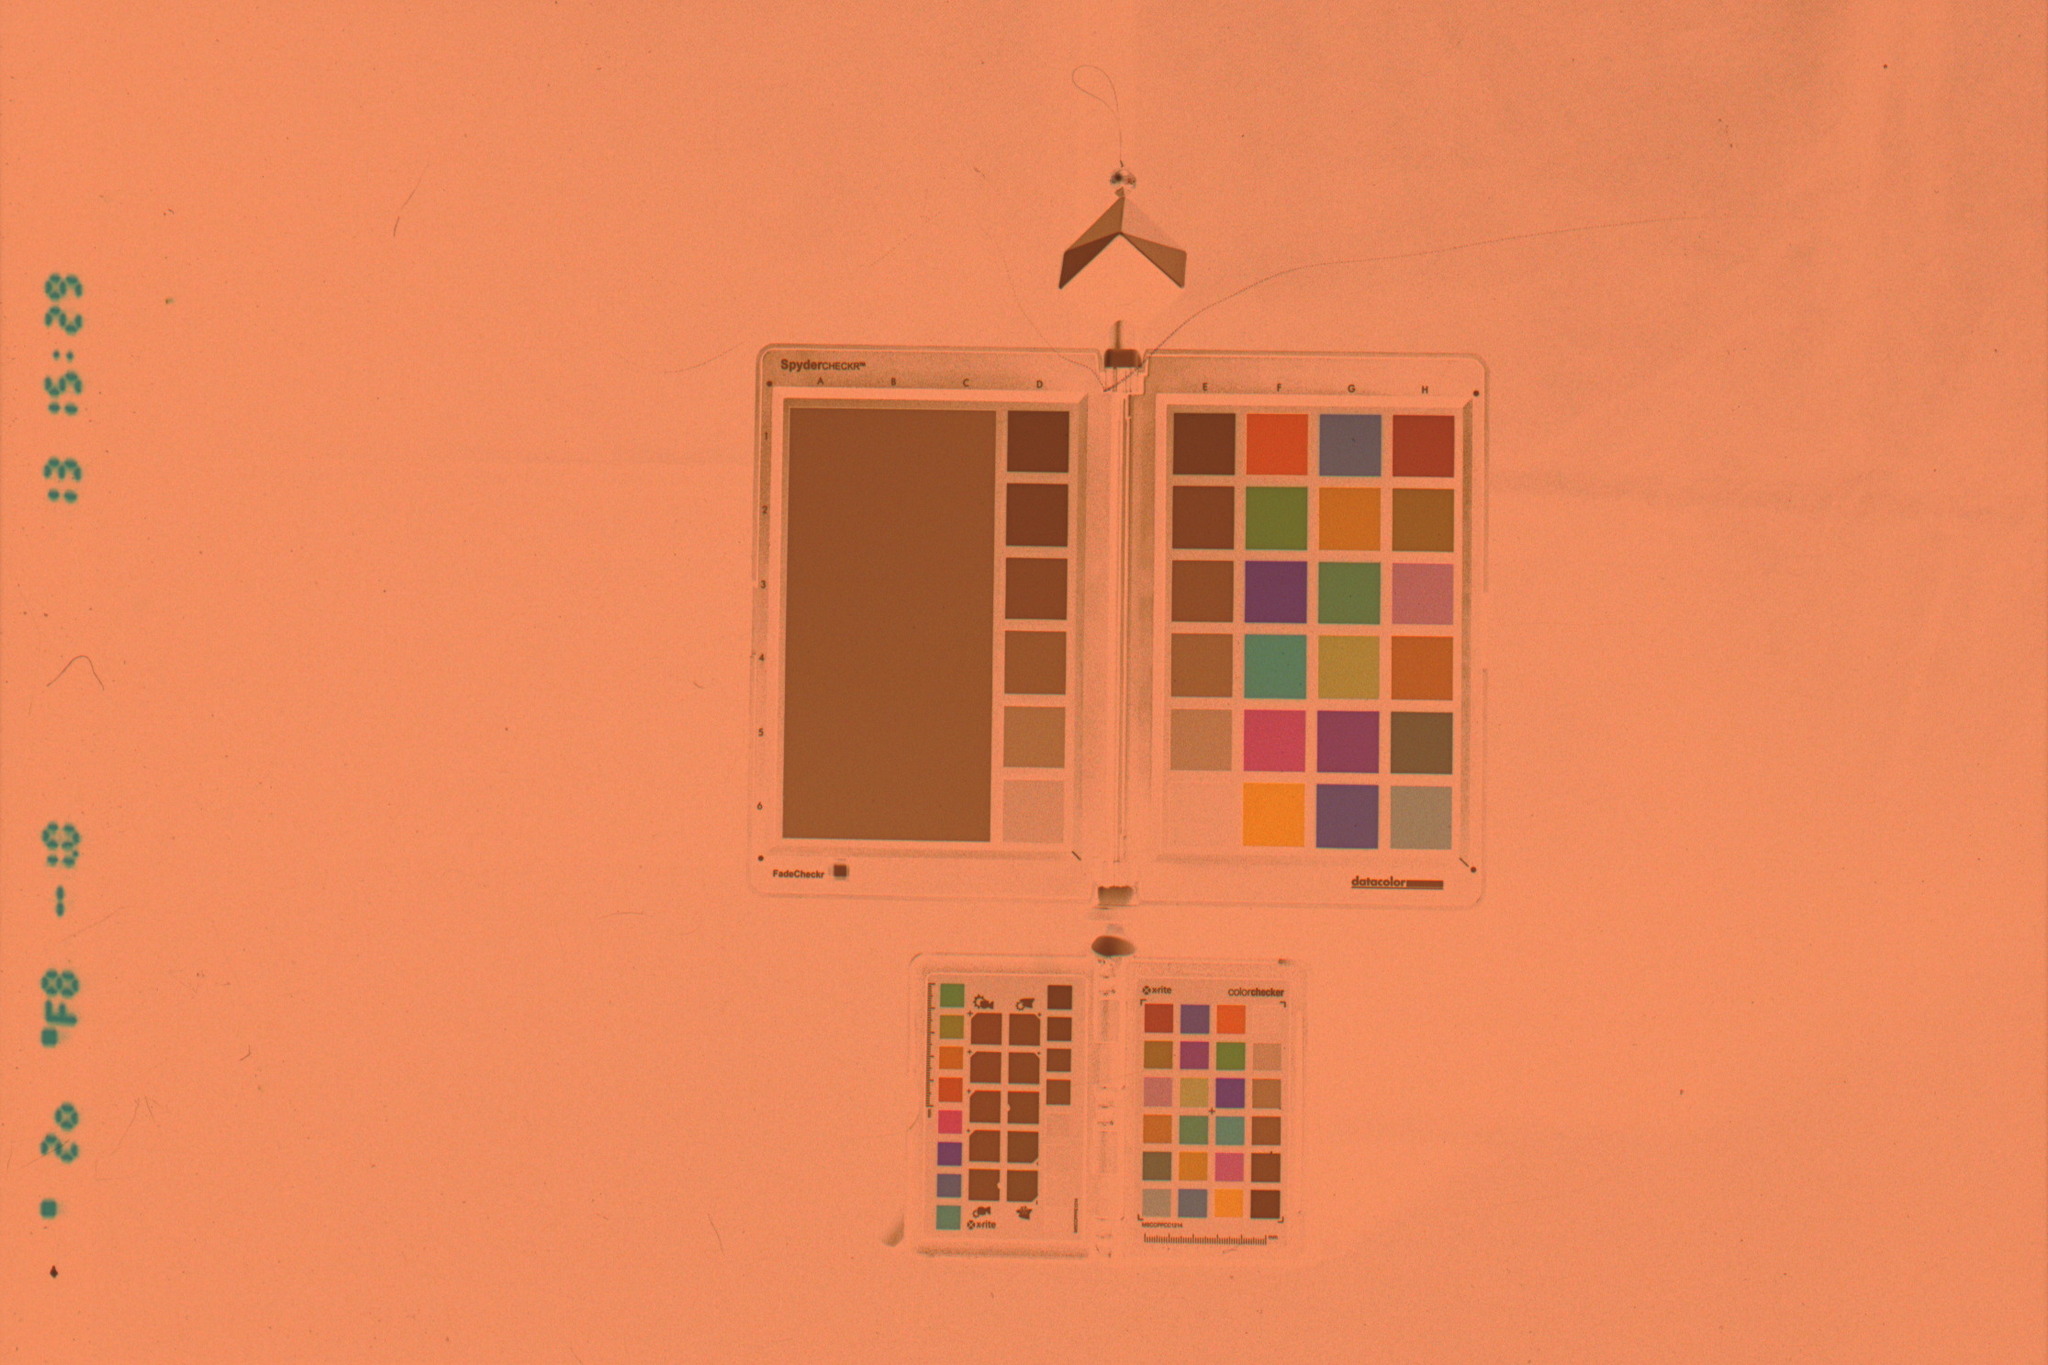
shooting the test stripe, i used a dark background and placed a colorchecker passport and spyder checkr target on it. actually one would be sufficient, but i put two targets, just to be able to play around with my editing software of choice: darktable. just to get used to it, how darktable handles these both targets. since the c41 process is able to develop a huge bunch of different film types, i just decided to shot the test stripes on a kodak ultramax 400 film roll. well and correctly exposed film roll full of 24 frames, which i can cut off if needed. but just a second before i did the first cut, i immediately knew, that it would be very hard if not impossible to cut on the exact frame edge. so there are some losses. 😀
processing and judging
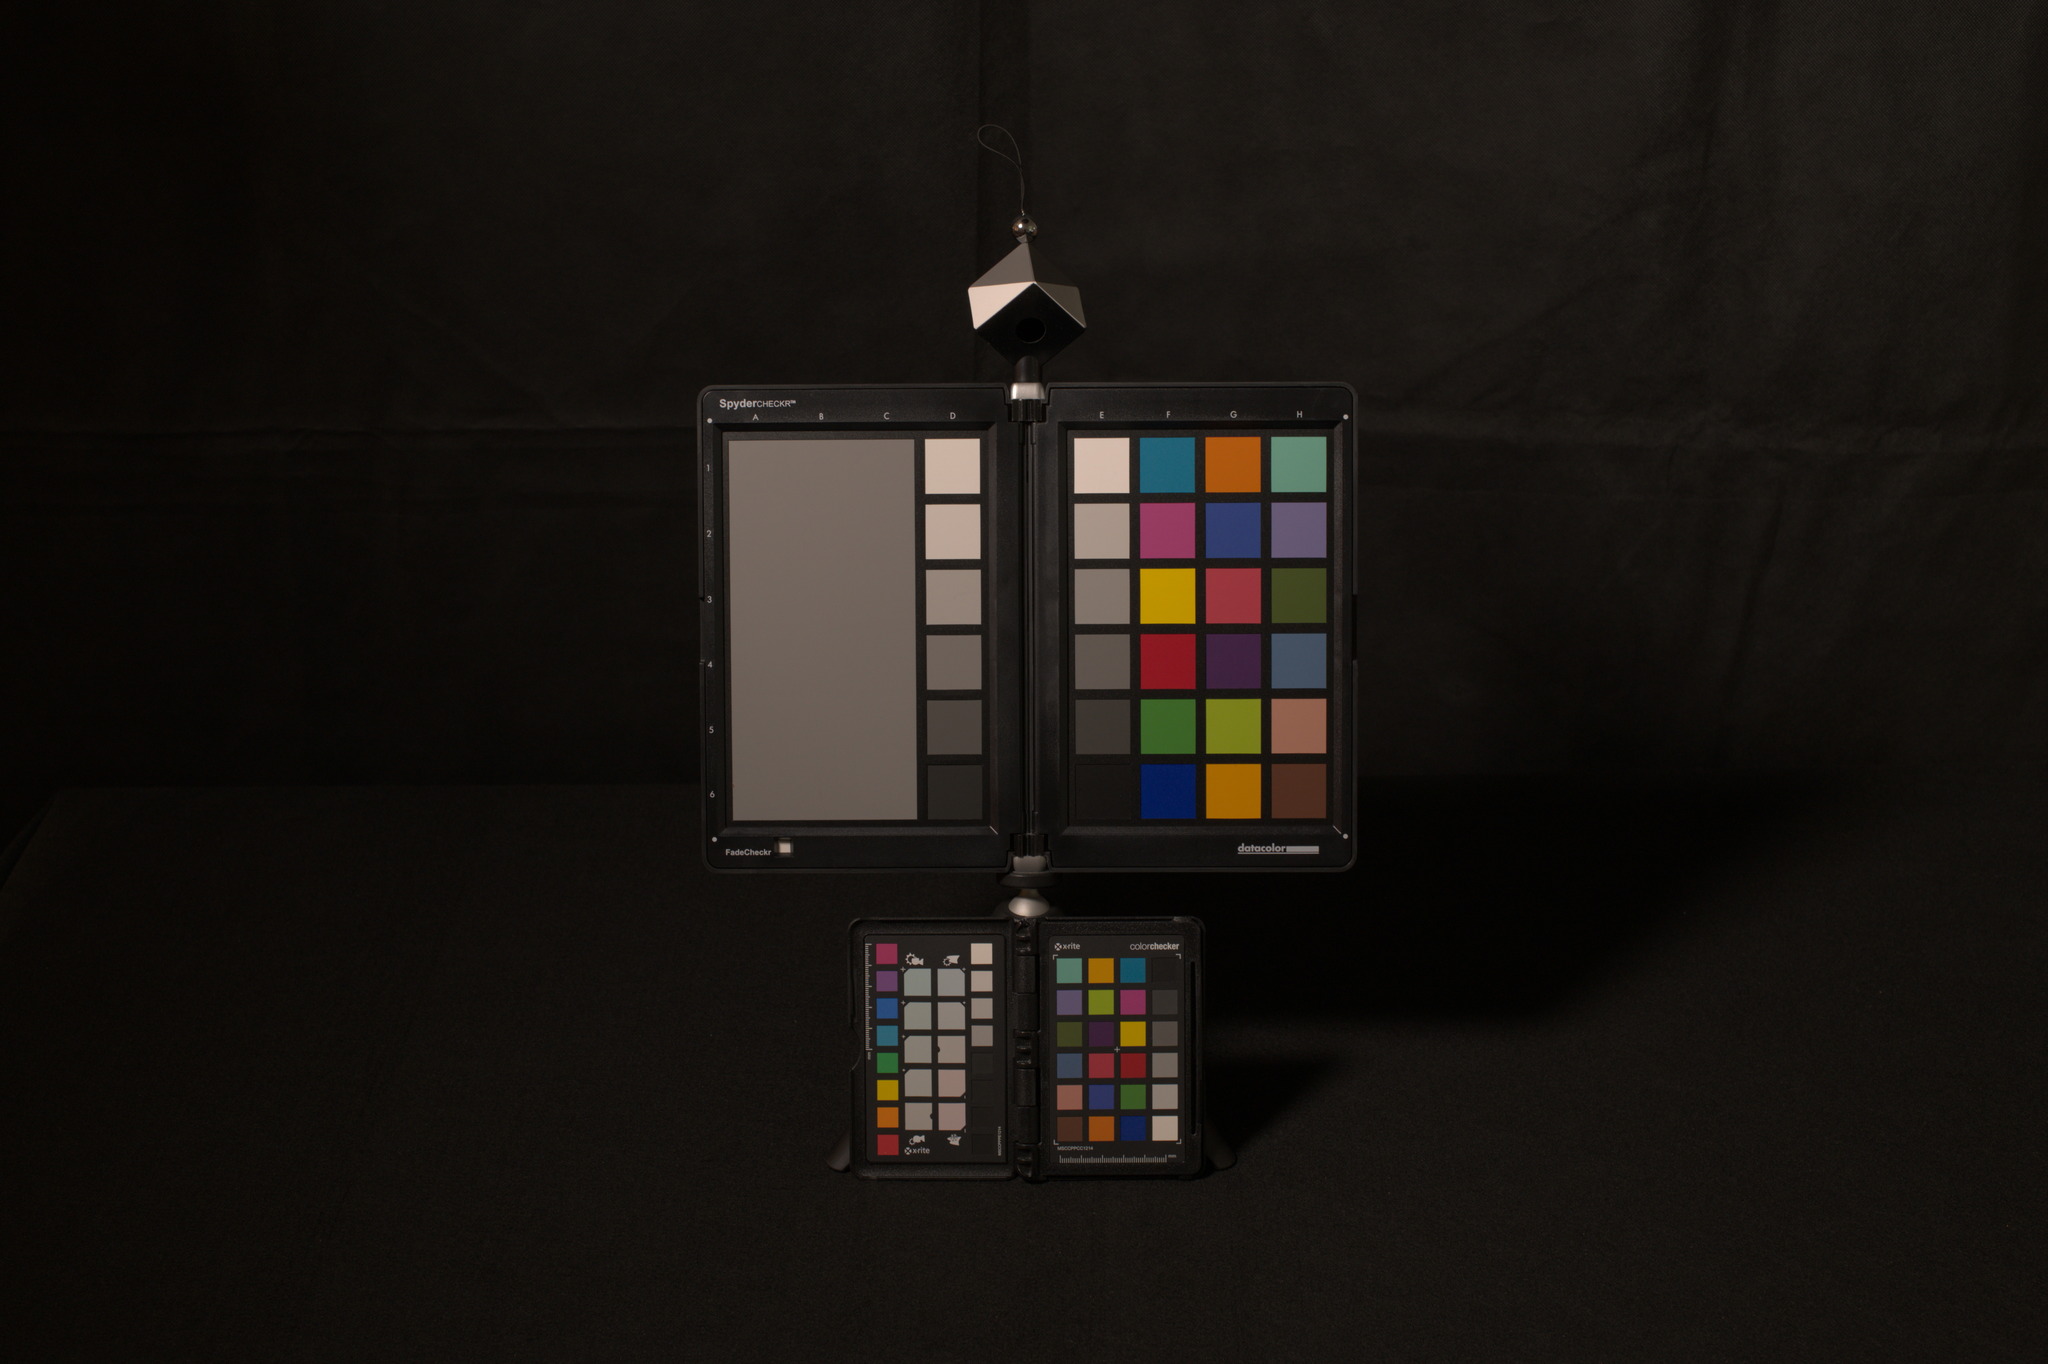
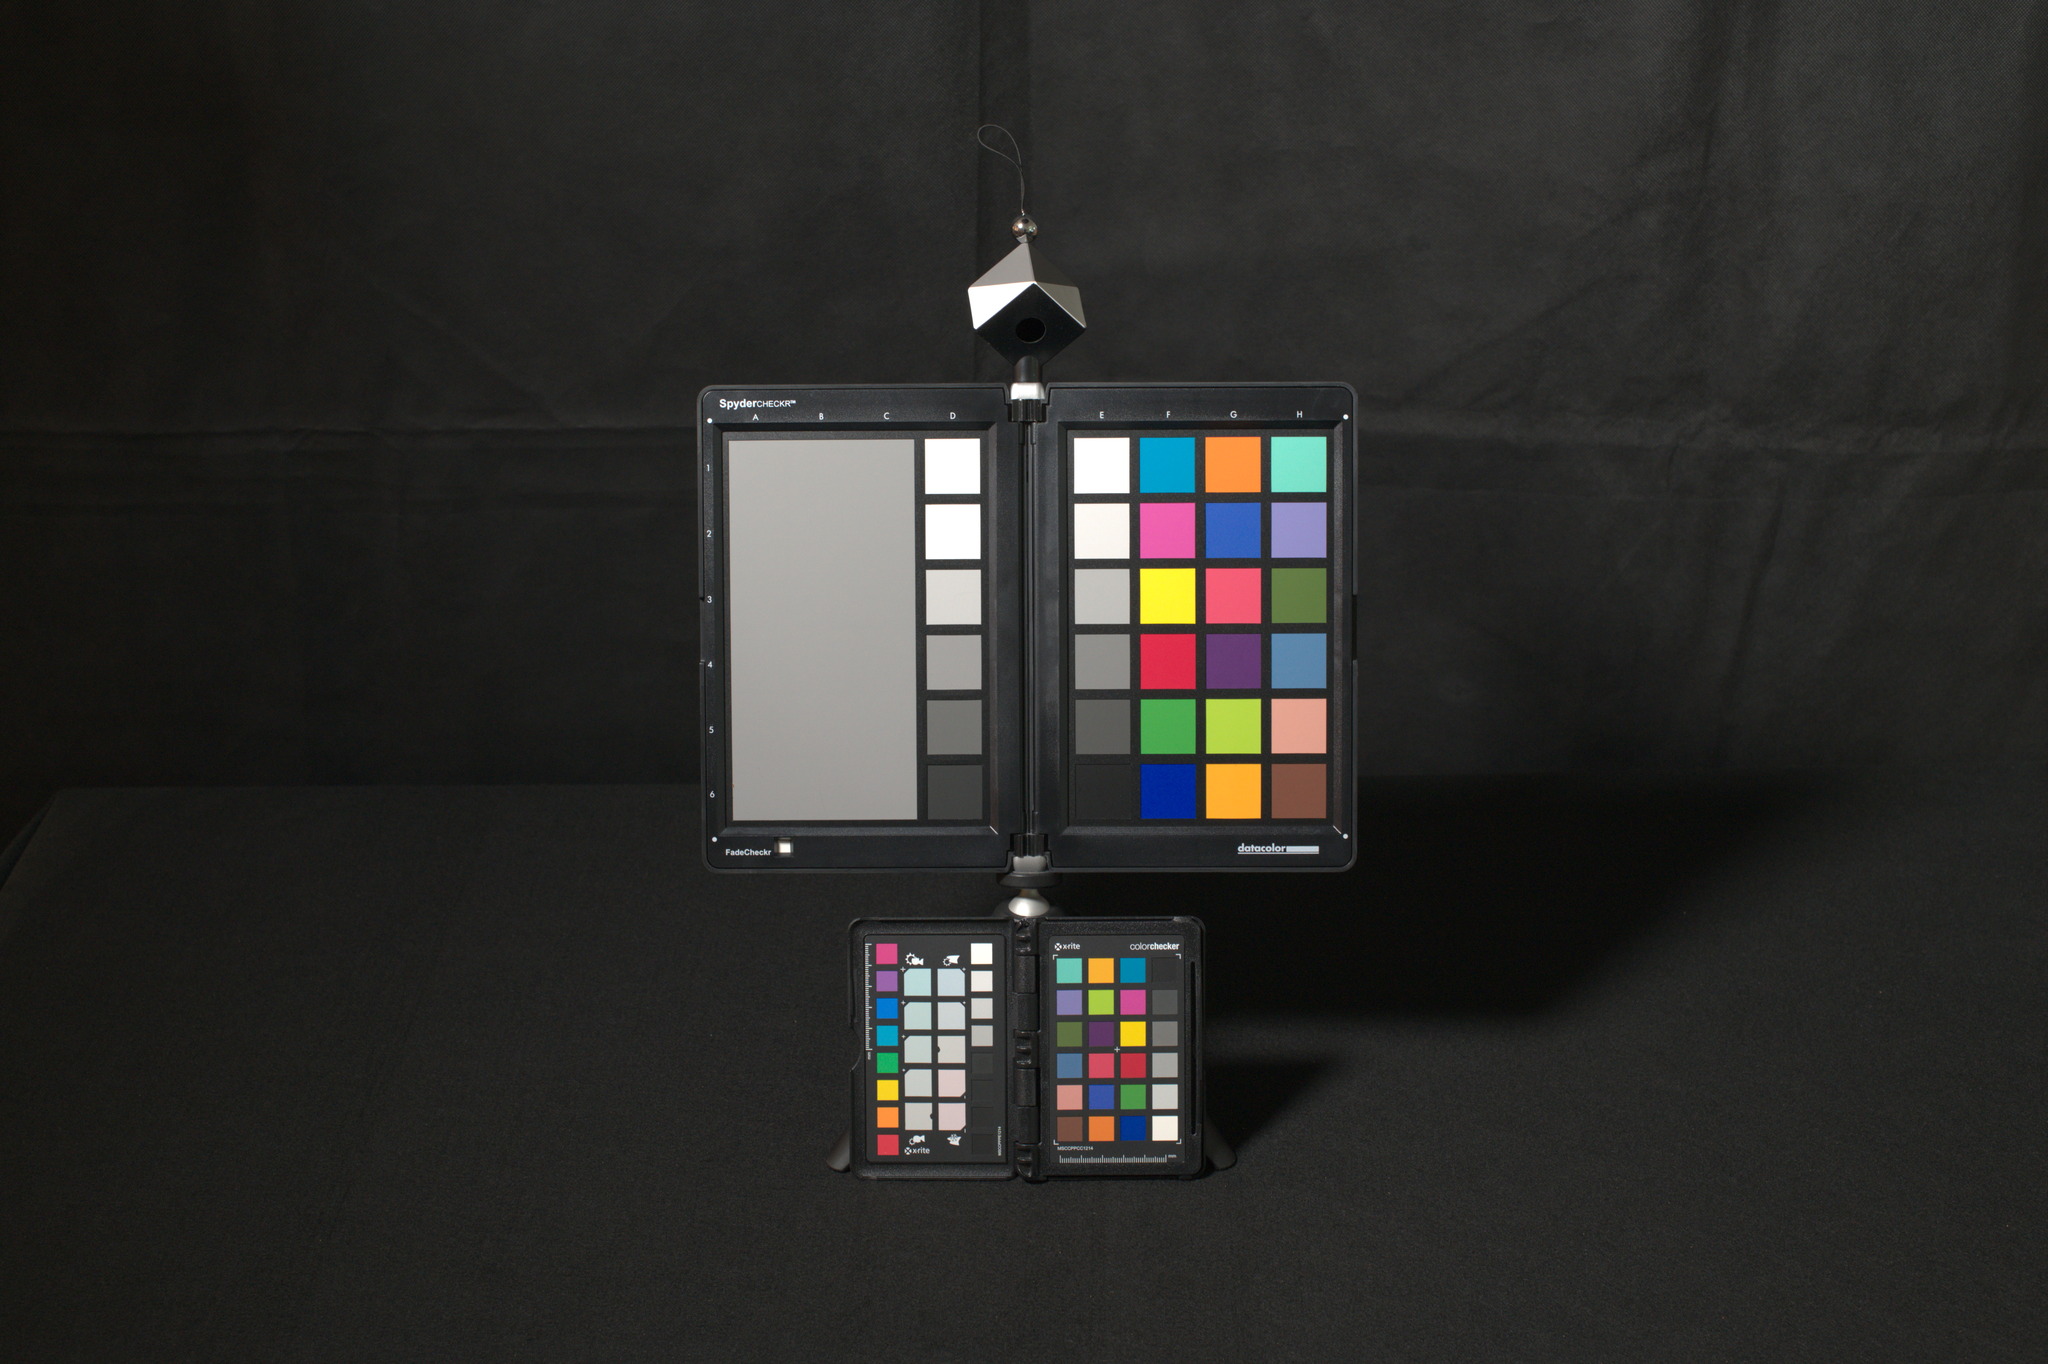
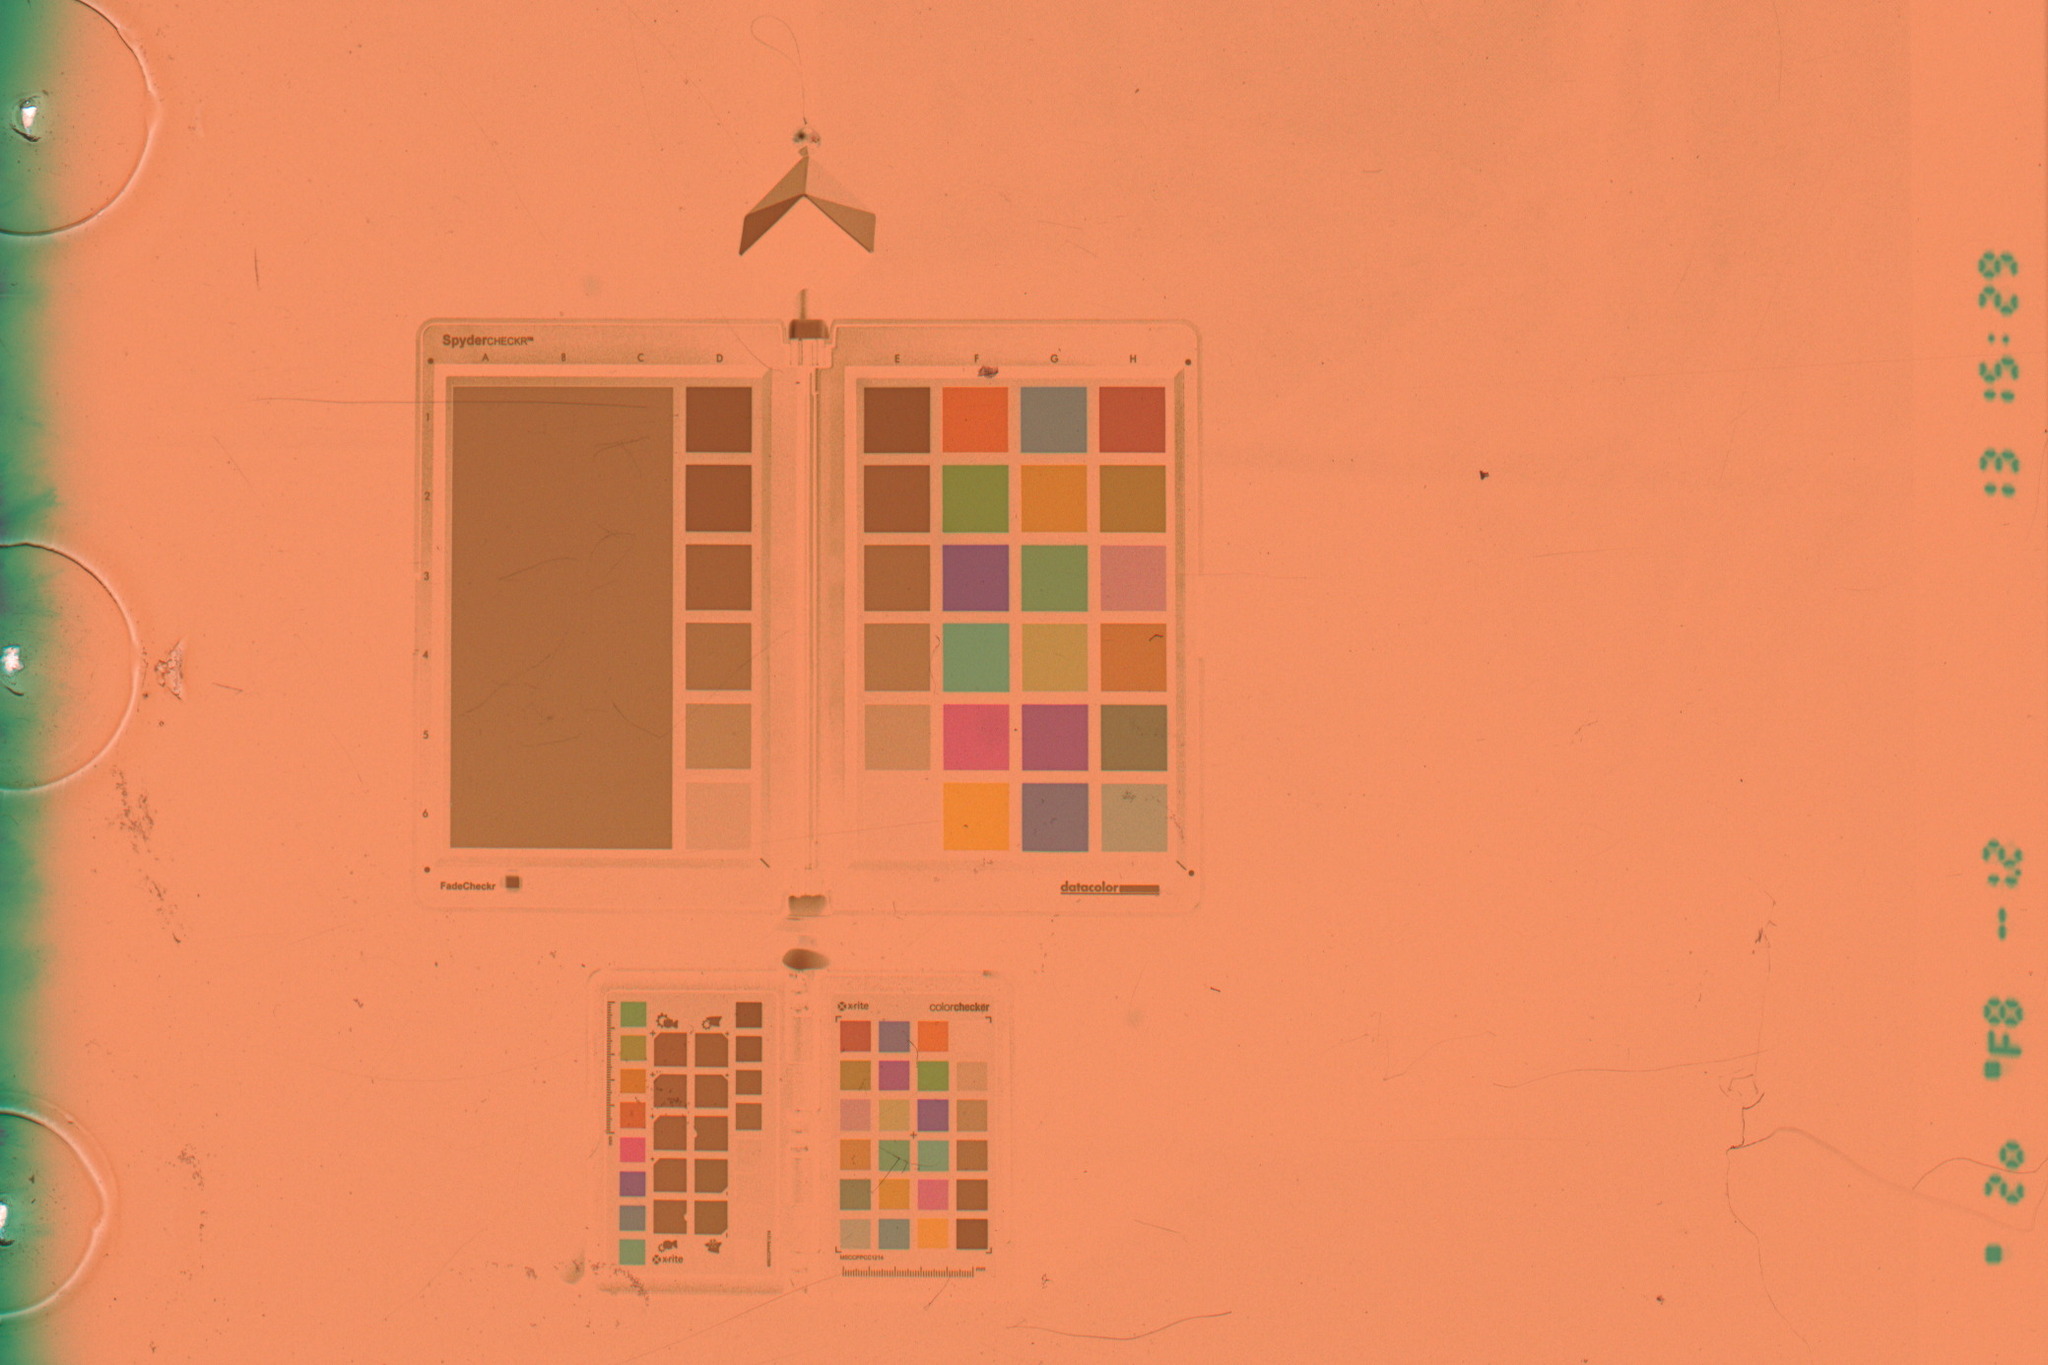
after a while, i had two negatives from the test roll, developed in cinestill cs41 powder kit. the picture below shows on the left side a negative which was developed in the mentioned 5 months old mixture. on the right side shows a negative developed within a freshly mixed dilution. at both times, i stuck to the same process given in the cinestill instruction. means 3,5 minutes in the developer and 8 minutes for bleaching and fixing – both with a temperature of 39°C.
already this image shows to me, that the contrast on the right negative seems to be better than on the left. since i have even just started with color negative processing, i do not feel ready to judge here whether the colors are accurate or eventually shifted. nonetheless, “colors” are visible – so far so good!
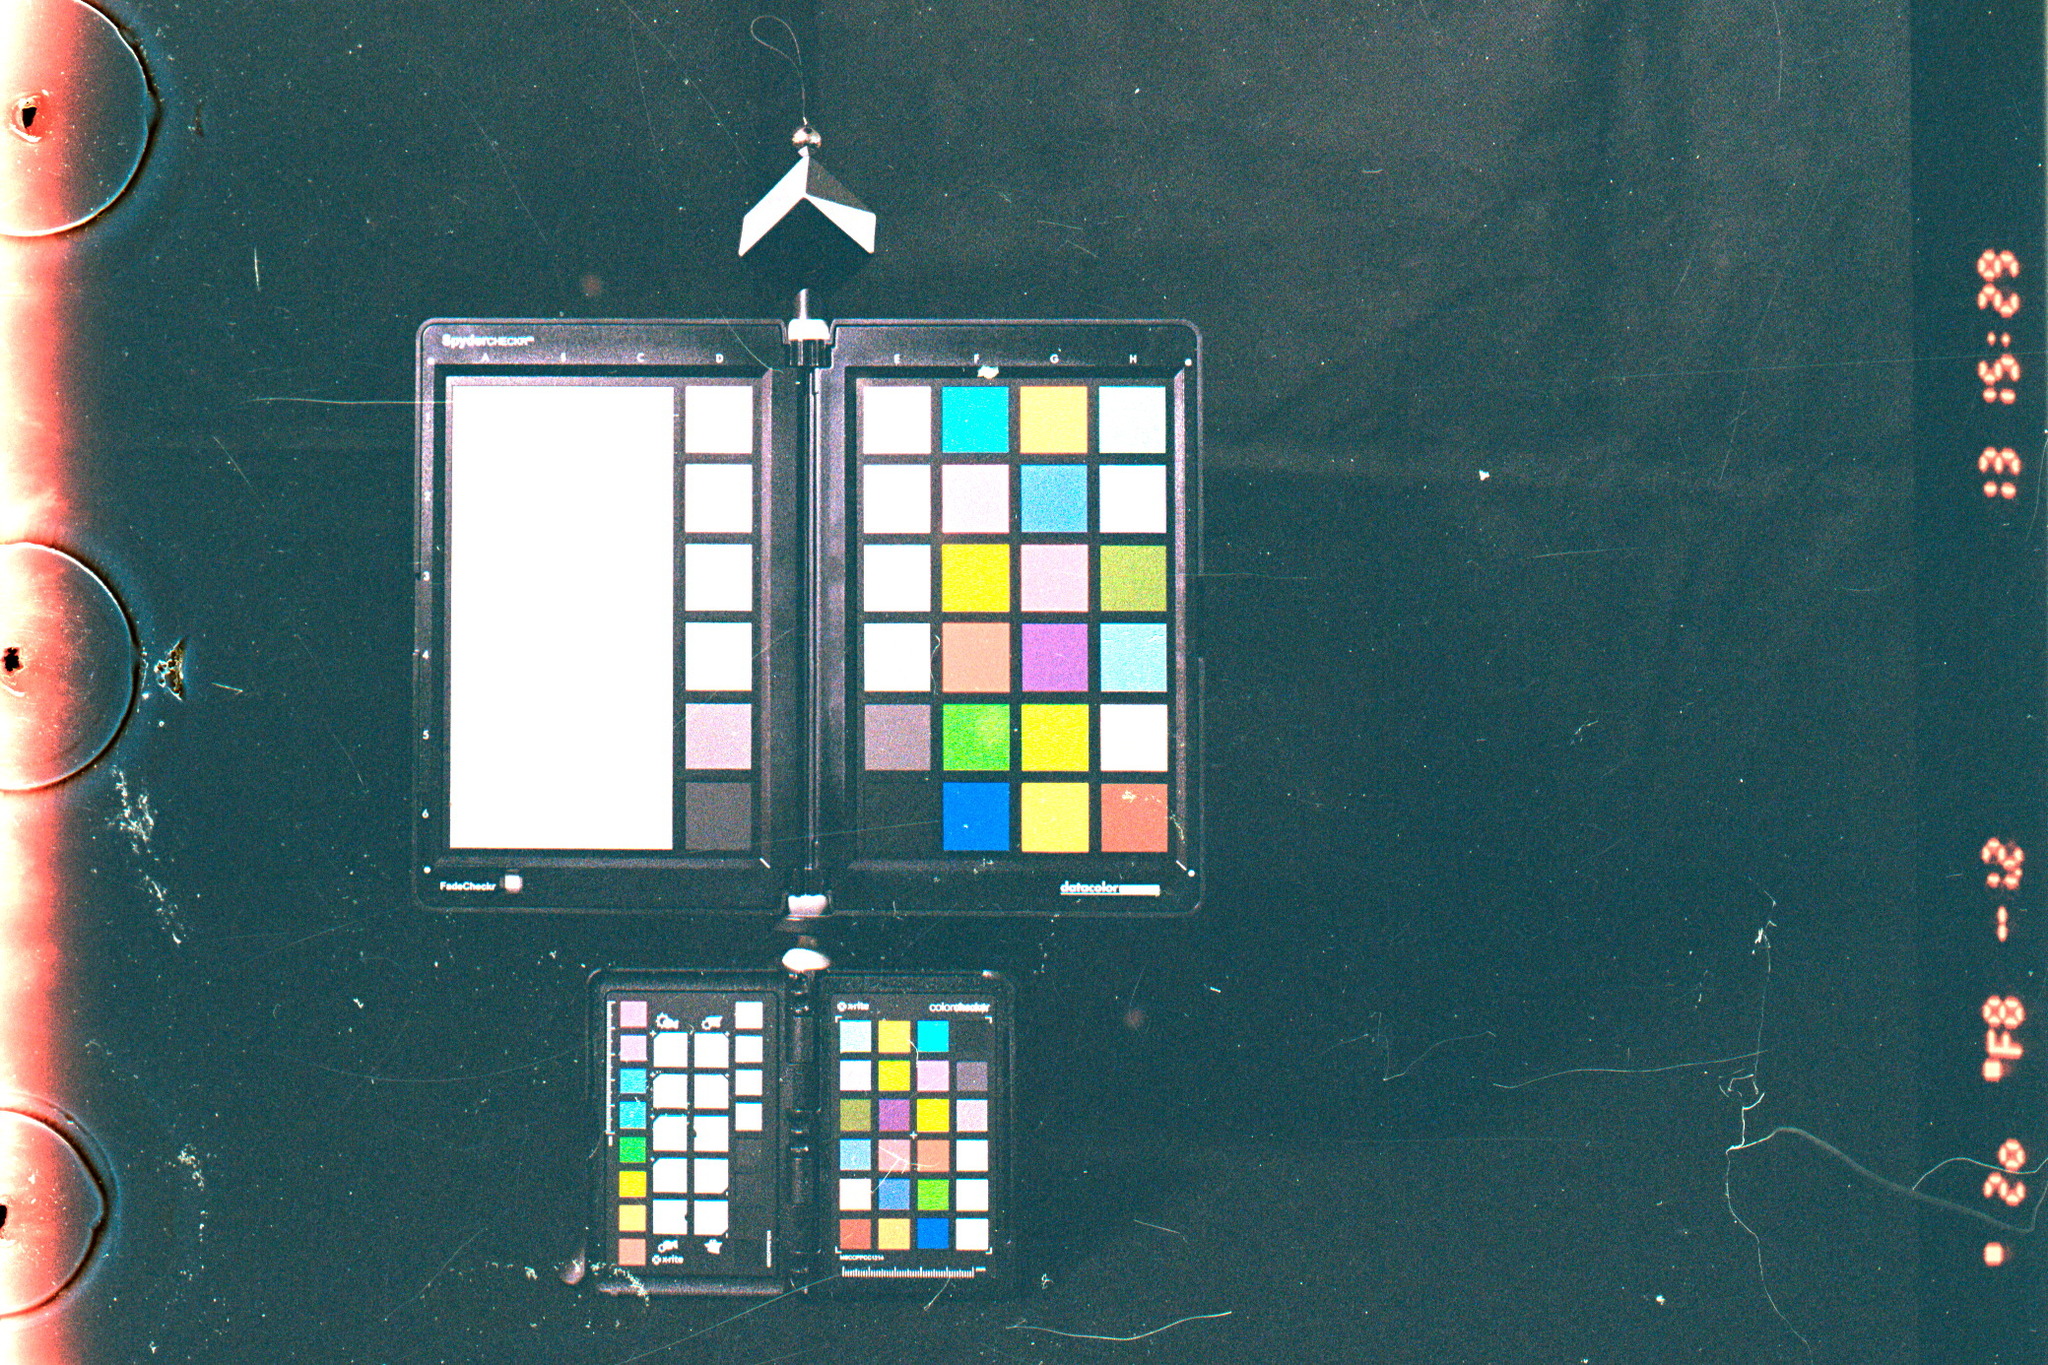
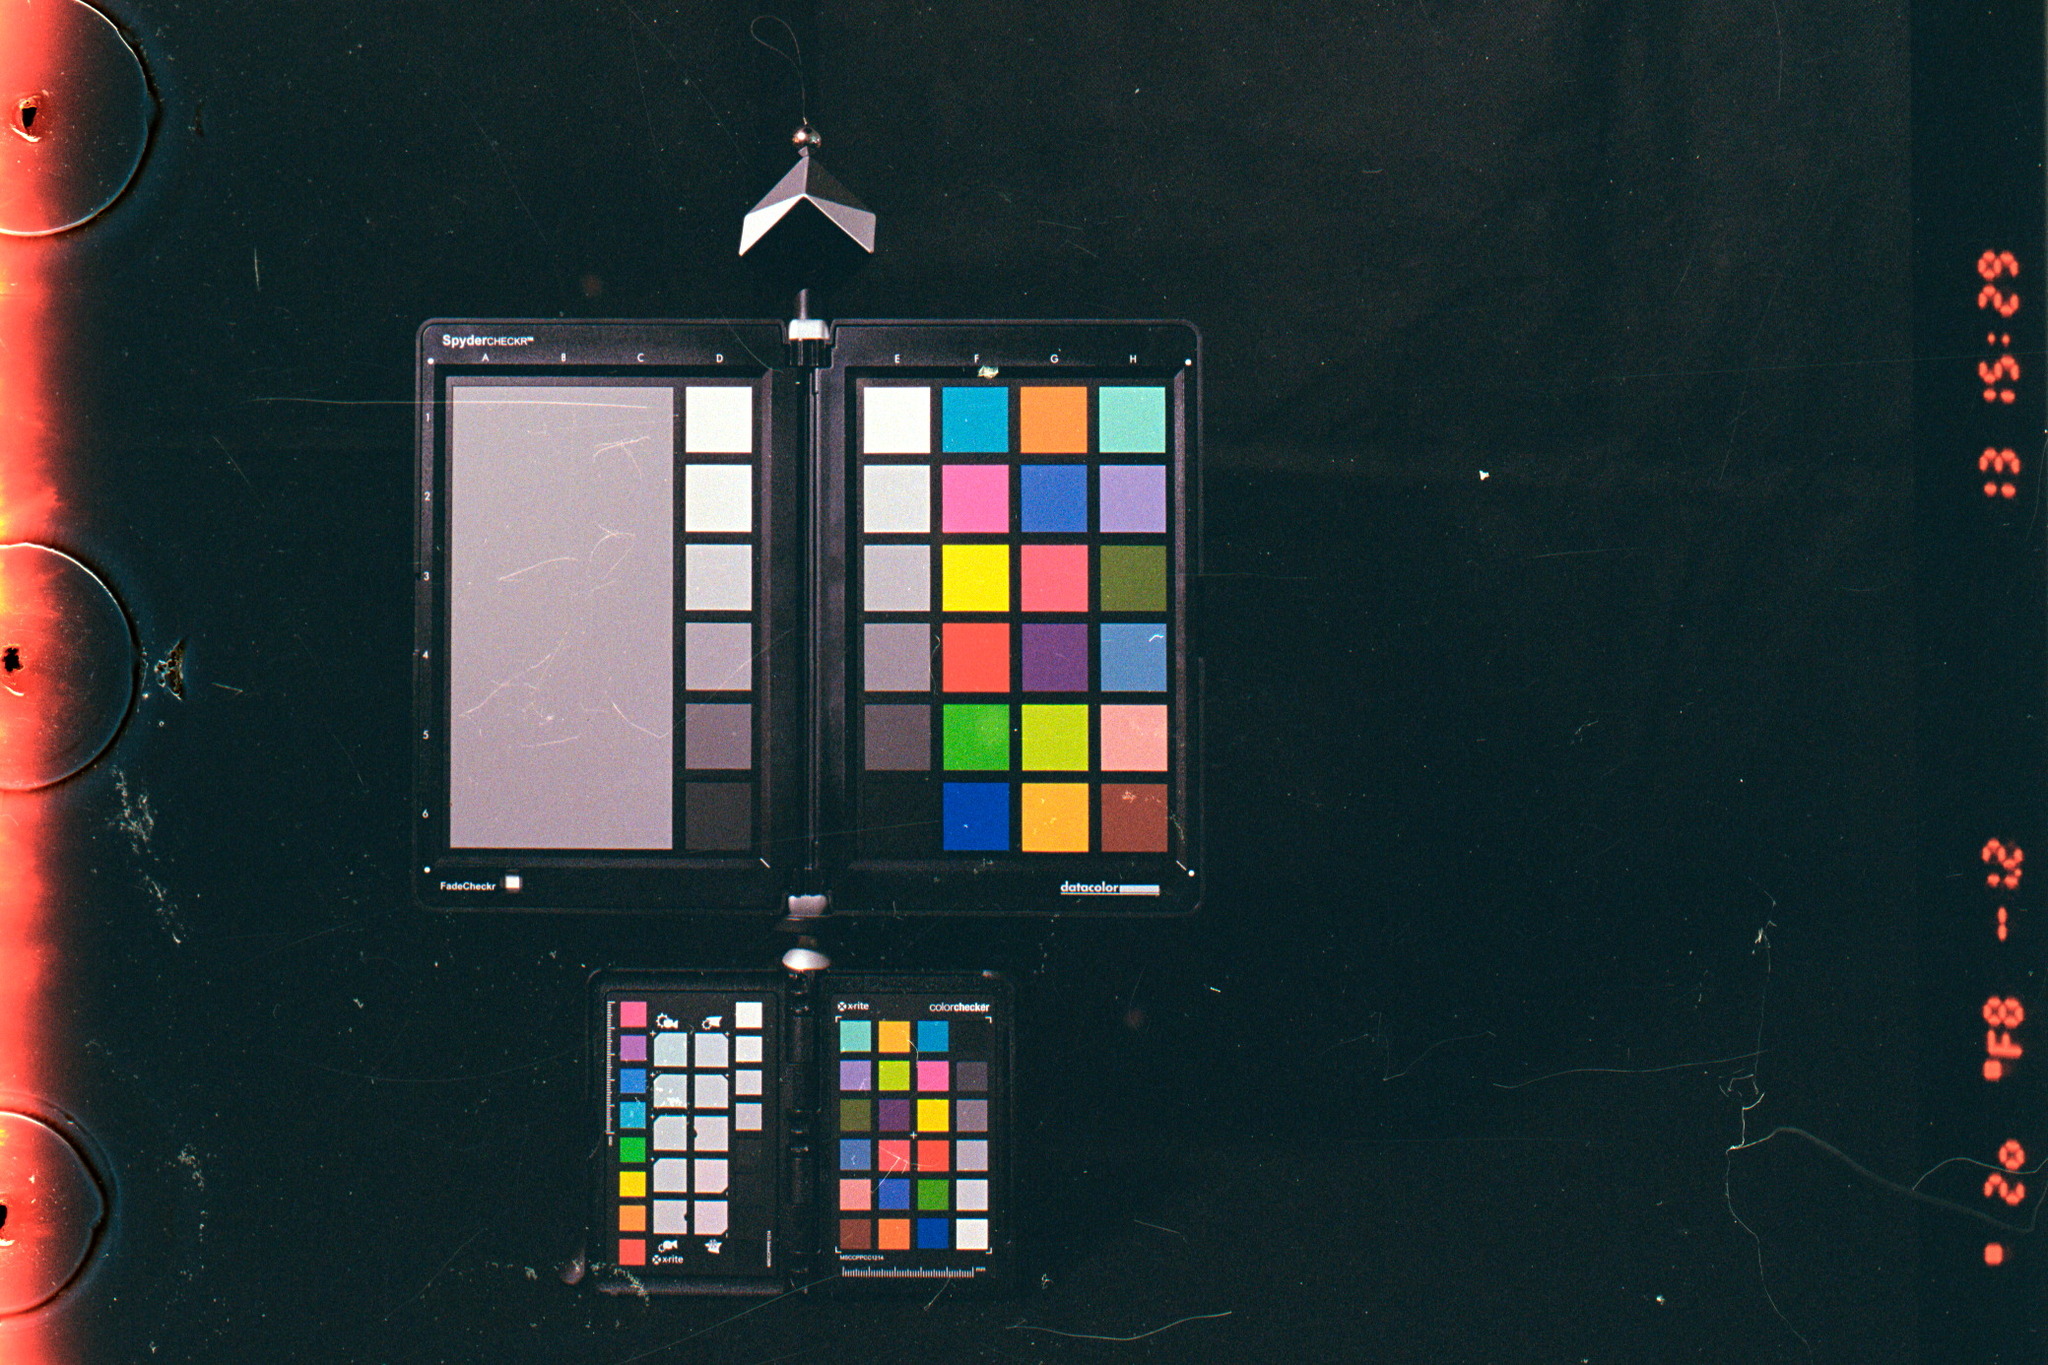
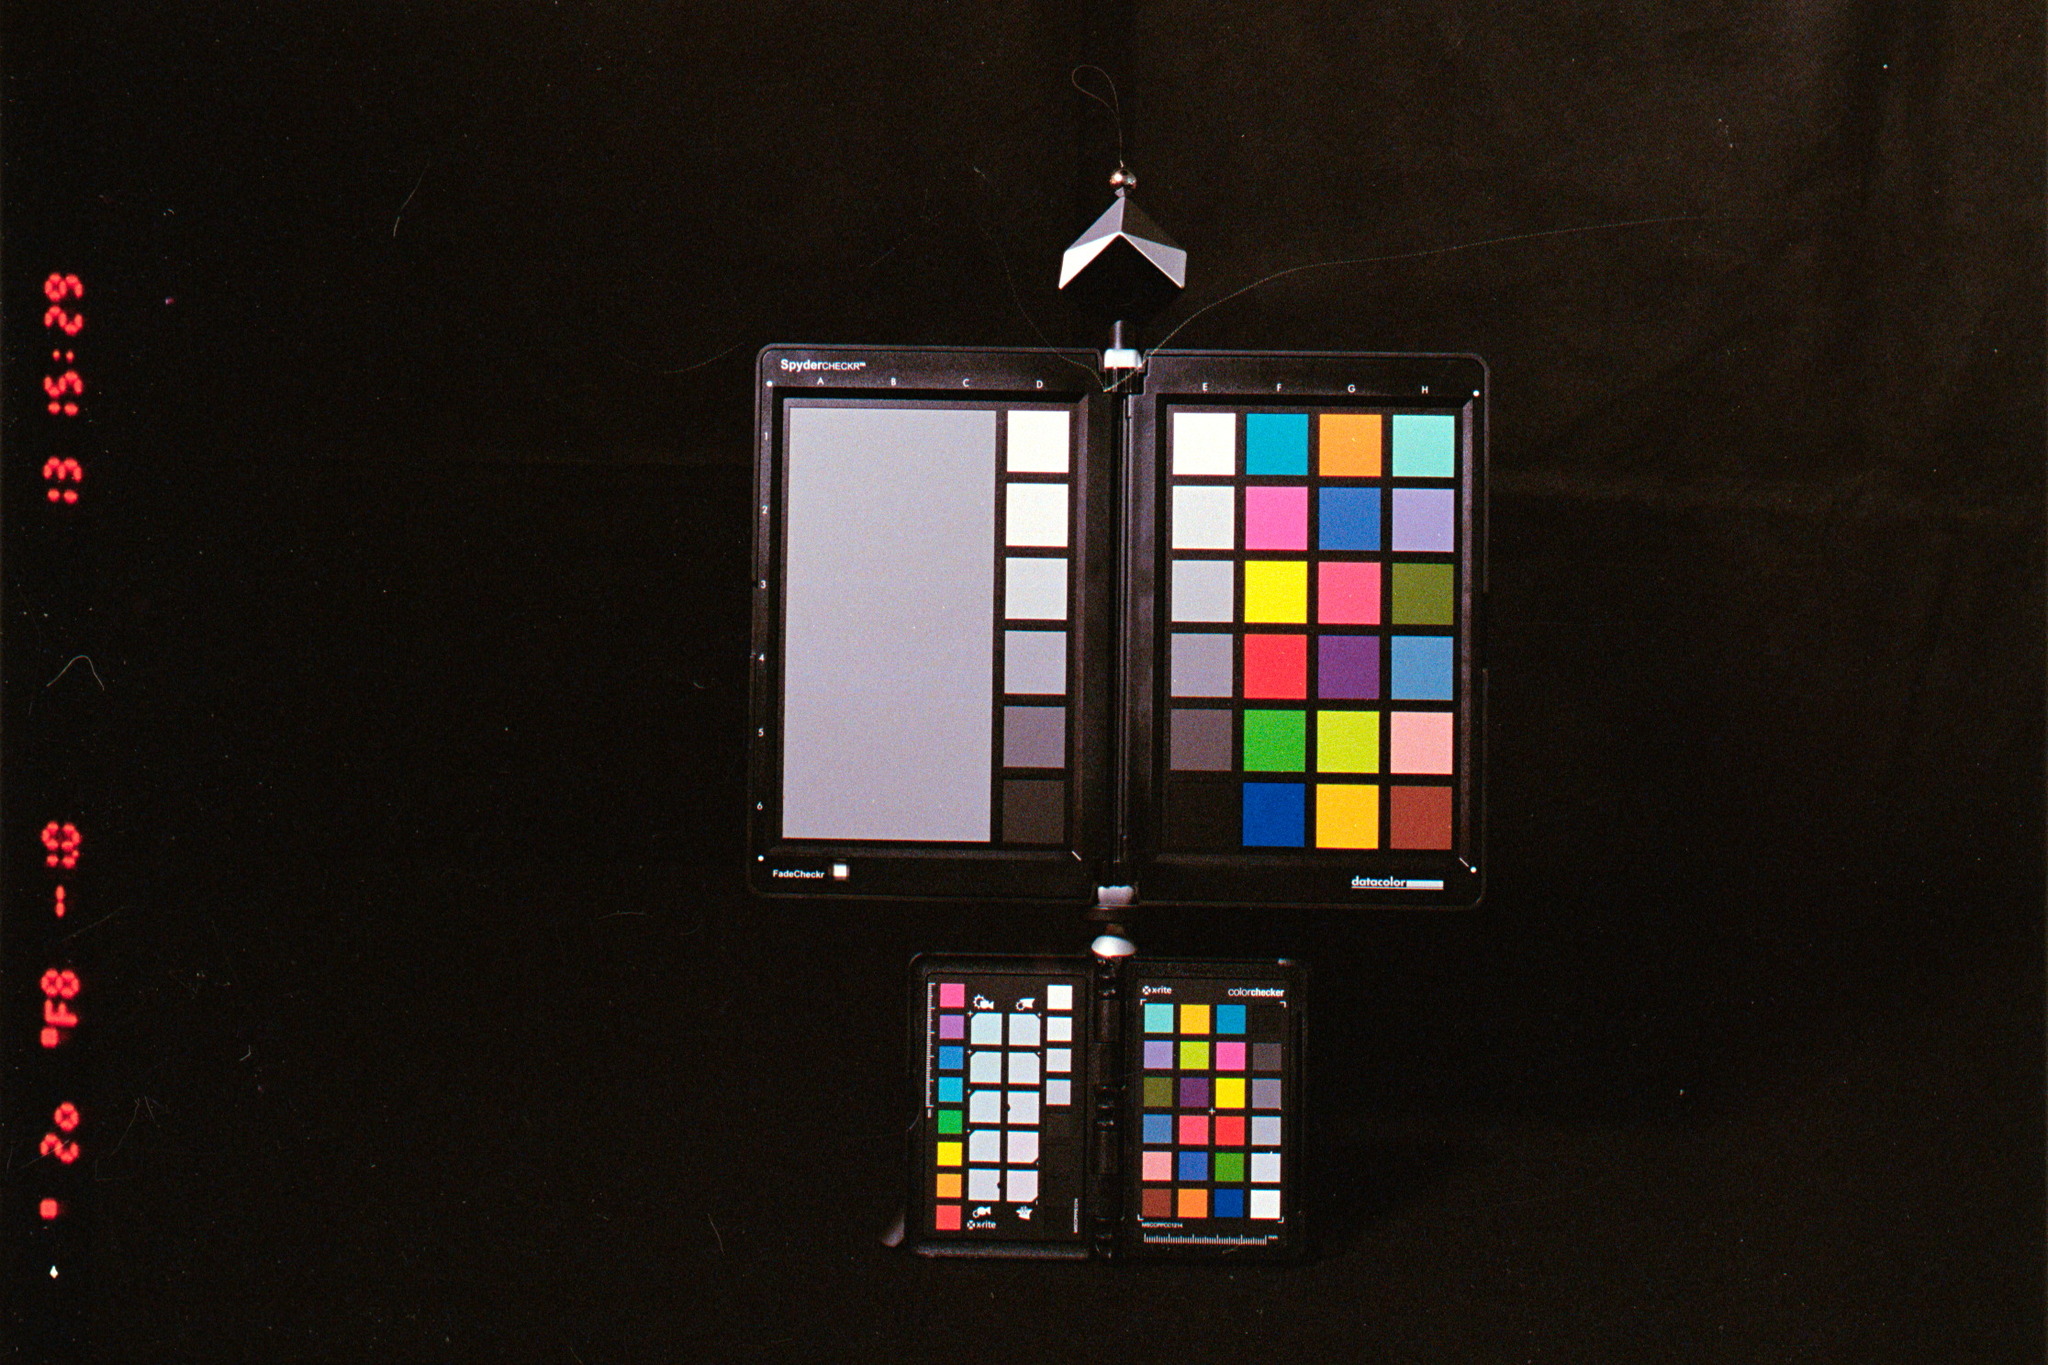
usually my negatives are scanned with the same settings and always in color (tiff, 16-bit, lossless). it even doesn’t matter if it’s a black and white film. colors still can be removed later. the images underneath are showing the scanned negatives, … same settings. it becomes even more visible than in the image above, that there is a noticeable difference in contrast. comparing the color of the target fields, i think that they seem to be very similar. the colors on the left are a kind of faded, … i would says.


the digital processing
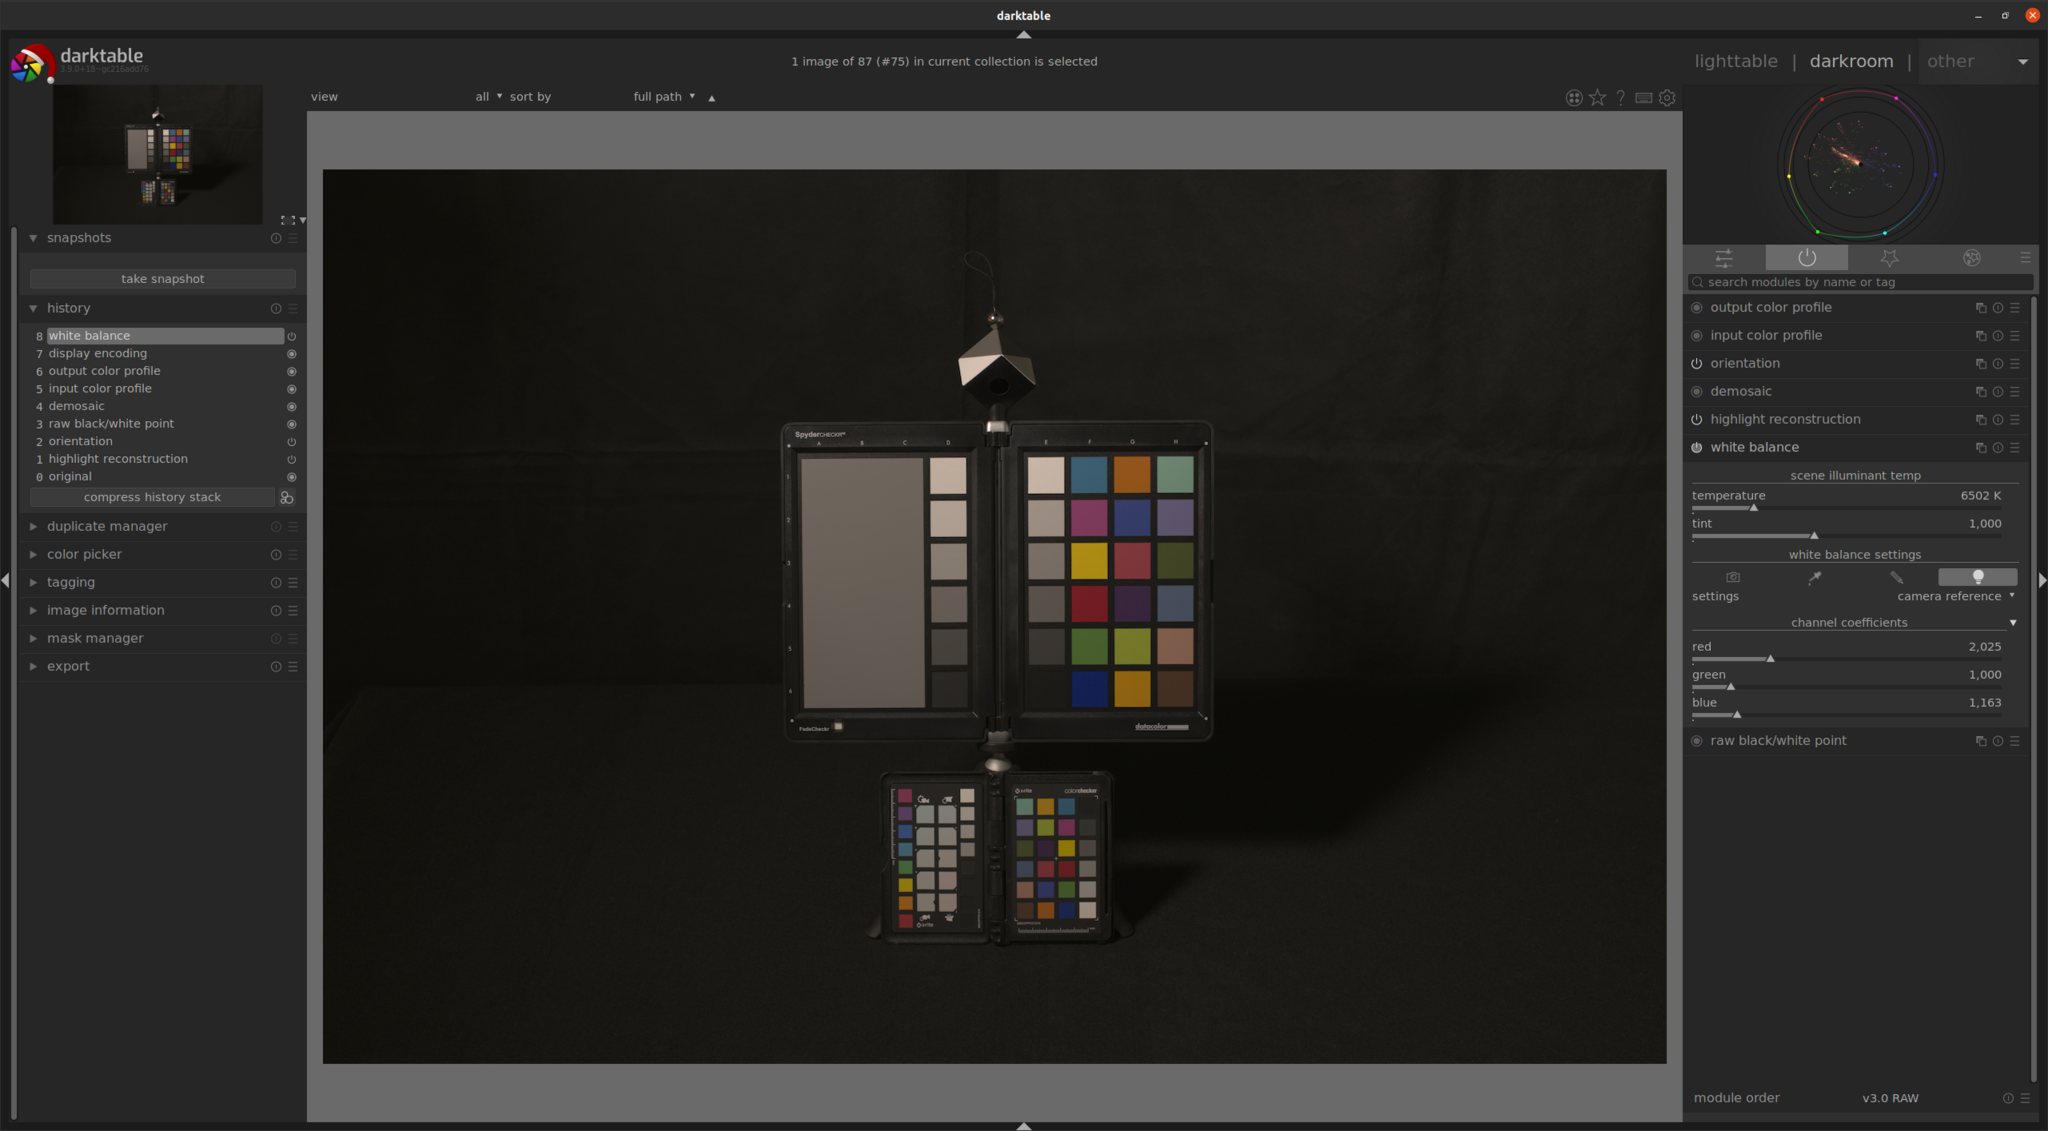
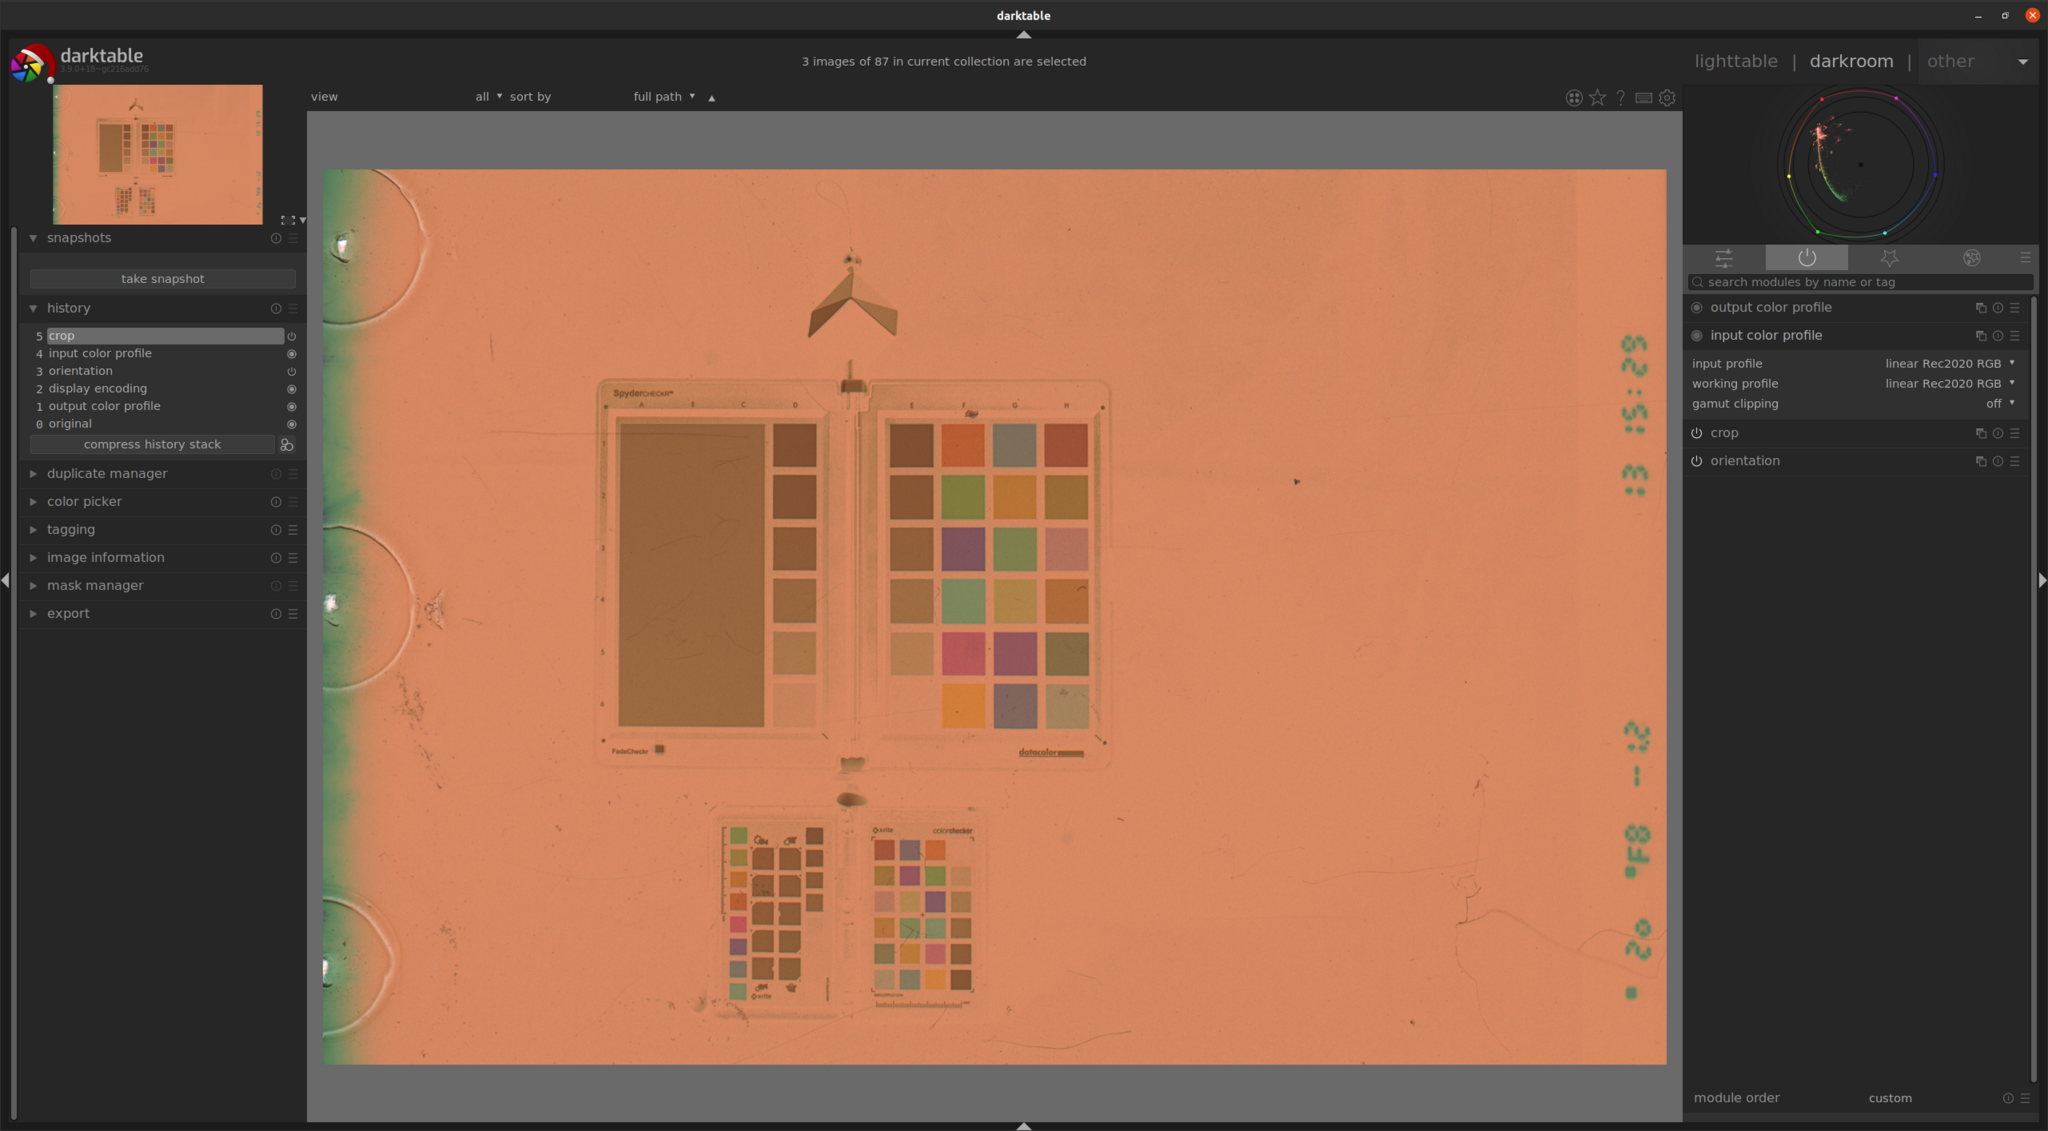
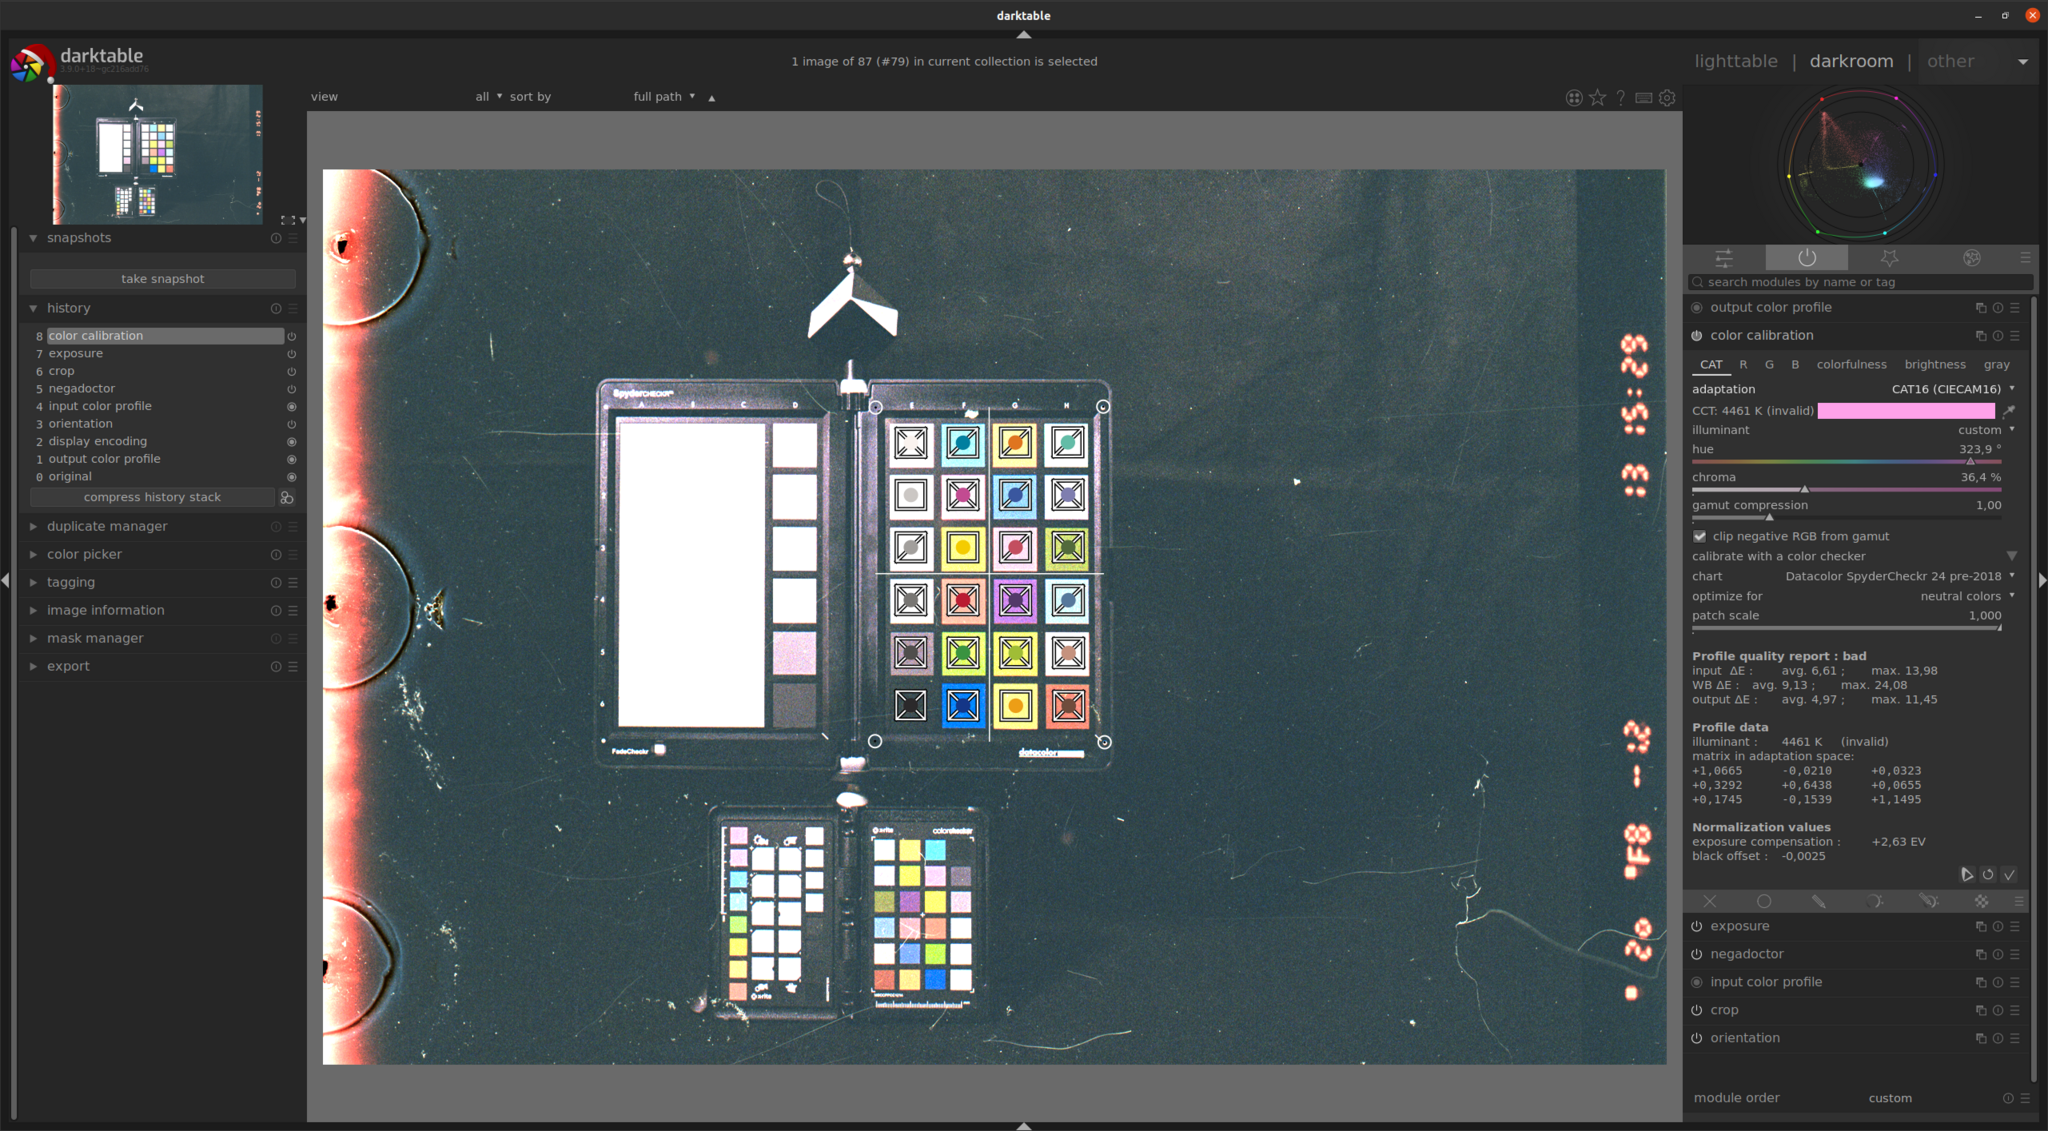
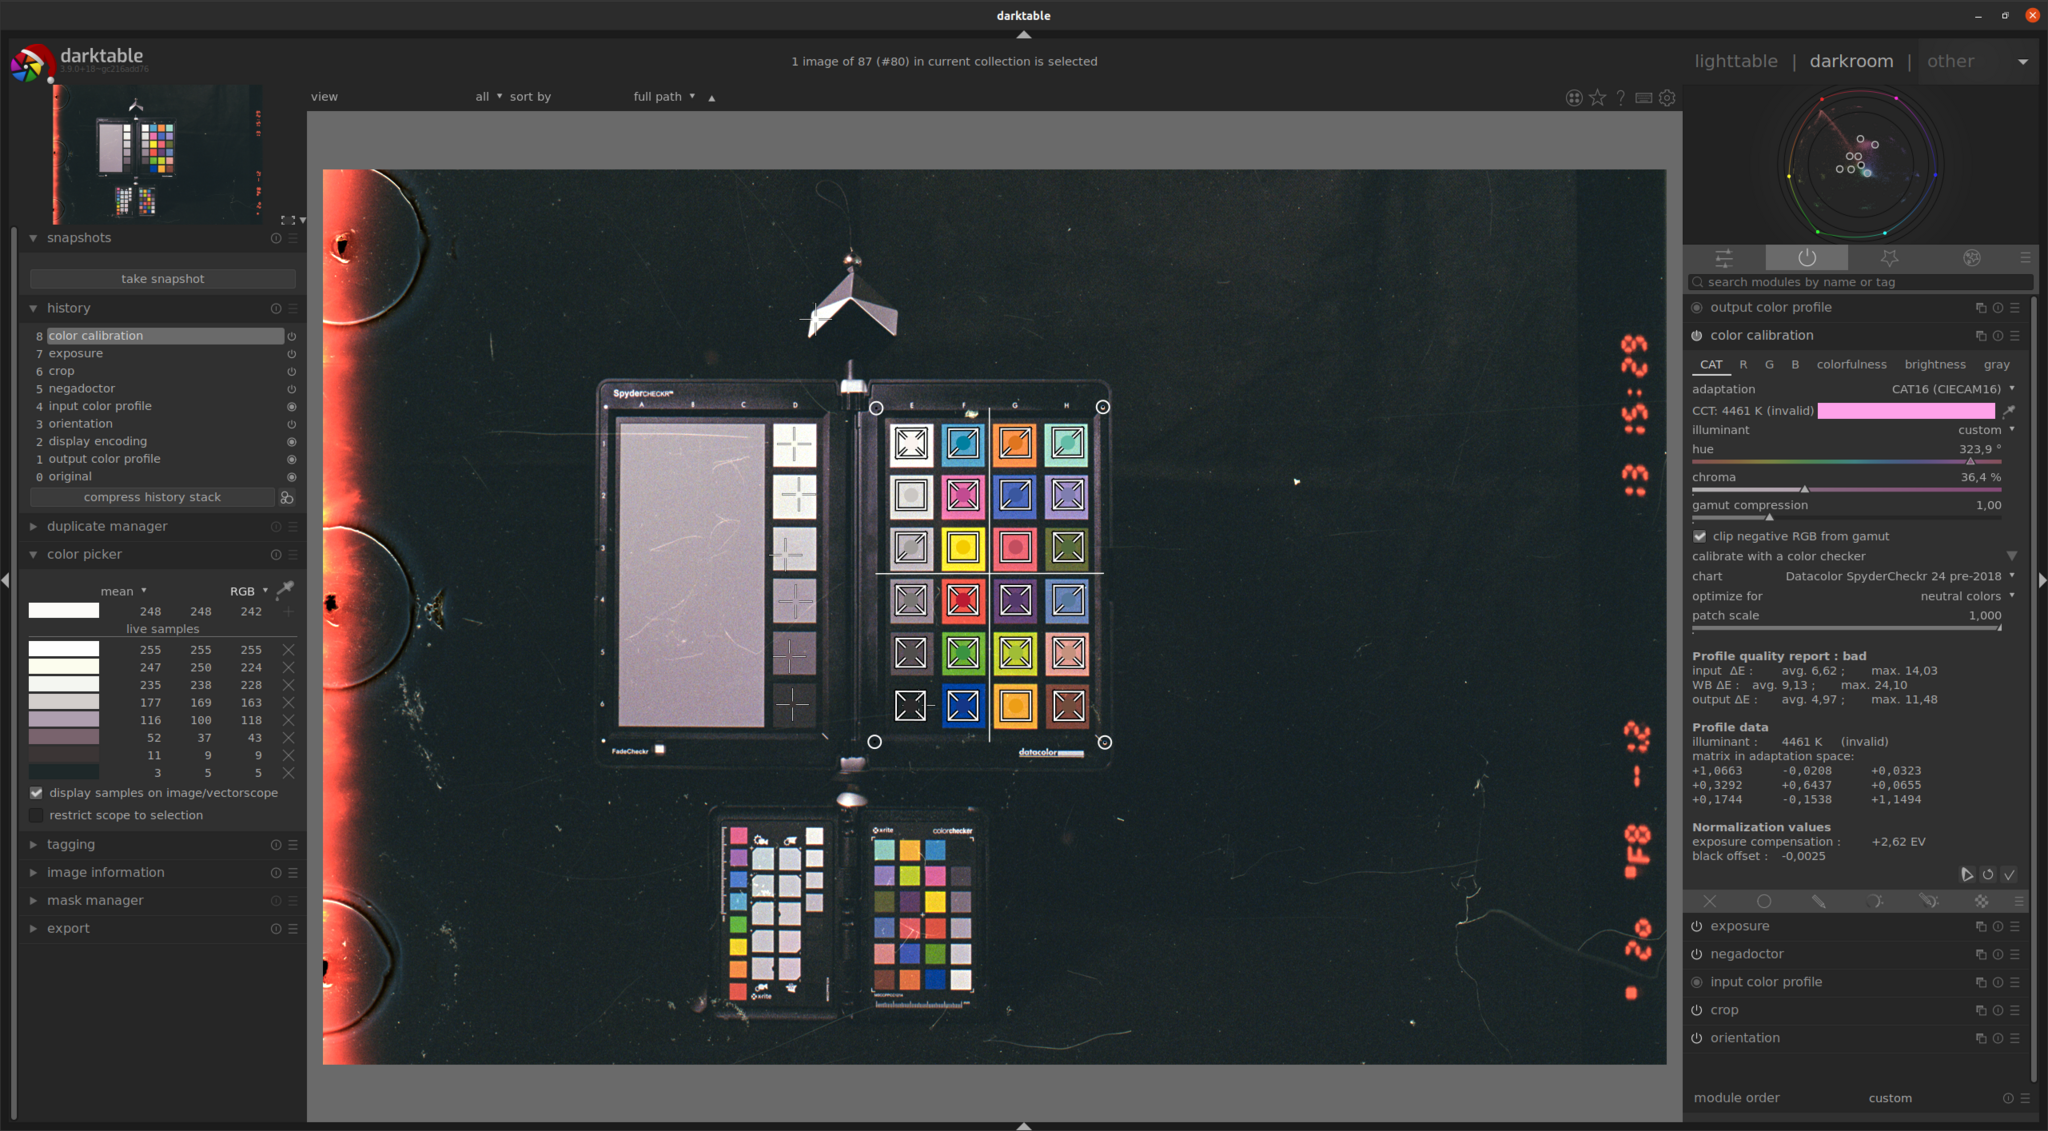
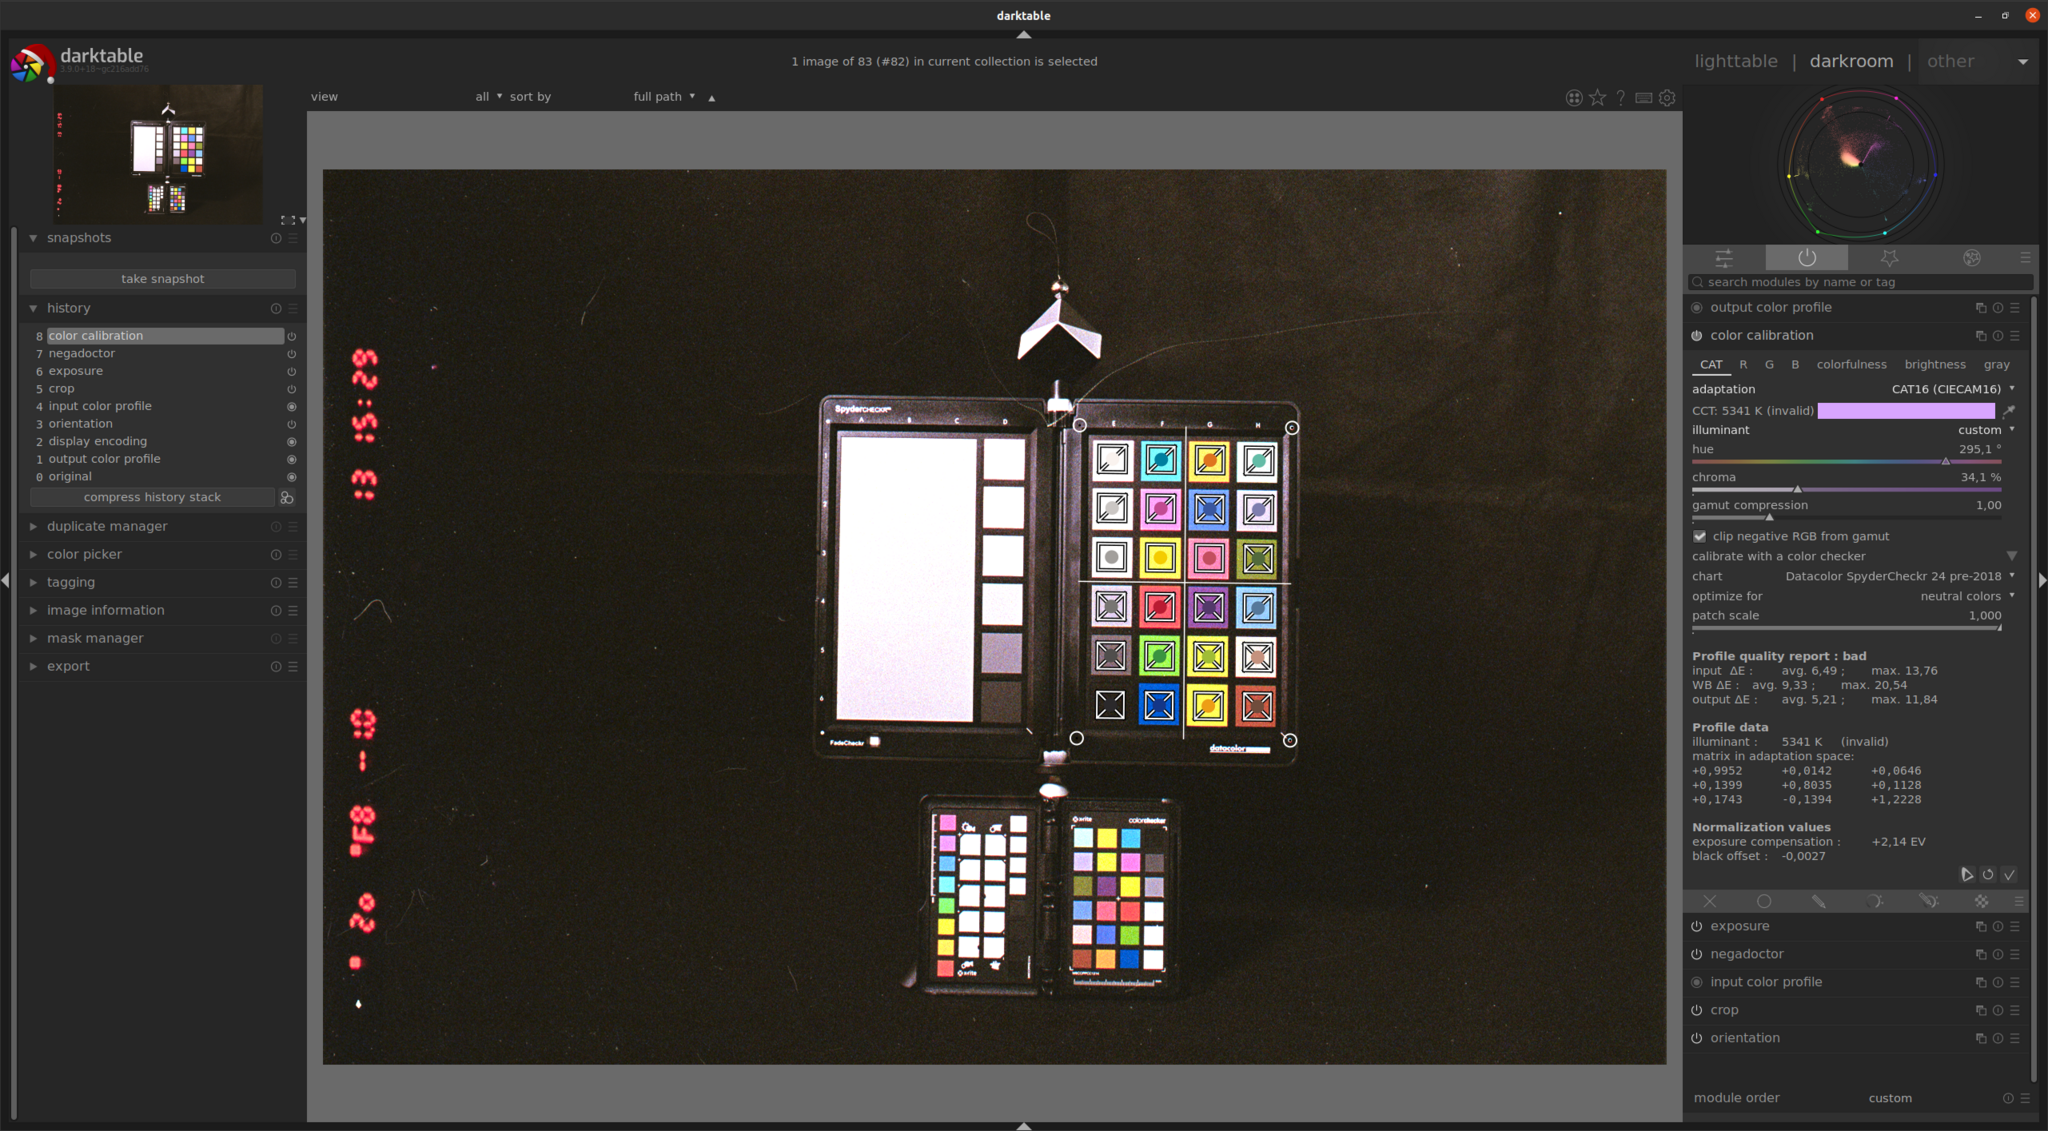
when the images are scanned i process them usually with darktable. this time i tried to be as accurate as i could be. therefore, i only inverted the negative and used the color calibration module to get the colors as natural as possible displayed. i’m not quite sure whether this module will work well with shrubby negatives, … together with tiff files the scanner returns. however, this is the module order i applied to them (bottom to top).
- output color profile
- color calibration
- exposure
- negadoctor [ module name is a bit weird, am i right? ]
- input color profile
- crop
- orientation
additional to the film negatives, i shot the same scene with a DSLR. just to compare the “digital” colors against the analogue world. actually, first i did a shot with the DSLR and took over the camera settings to the film camera. film speed ISO 400 is given by the choice of film, which is kodak ultramax. exposure time is set to 1/20 of a second.
all the three images (left: DSLR; middle: 5 months old dilution; right: fresh mixed dilutions) are processed in darktable in the same module order as shown above. the film negative is inverted with the negadoctor module, … o.k. this is not done for the DSLR image. 😉
- 1st row are the “negatives” shown again, without further processing in darktable
- 2nd row after inversion. i only applied the color calibration module and set the exposure values to the suggested values
- 3rd row shows optimized images. for the DSLR image i added the filmic rgb module. for the film negatives i reduced the exposure value. the gray fields of the target helped here.
the DSLR images in the left column show quite a good result in respect to colors. the top image in this column shows how the raw file is interpreted without any additional settings in darktable. both others are clean and already good to use. the interesting part begins when we compare the negatives and how their colors behave.
we can see what’s the effect of a 5 months old cinestill dilution seems to have. in addition, how the color calibration module handles the film negatives. means, that the images [2.2a] and [3.2a] are first a kind of overexposed. this happened due to, that the calibration module provides an estimated exposure value which can be directly set in the exposure module. the estimation seems to be a bit to high. therefore, i optimized/reduced the exposure value in relation to the gray fields of the target. the images [2.3a] and [3.3a] are more equalized in respect of exposure. compared to the digital image as well.
… but what about the colors? let’s have look further down.

judging colors
this is now the “moment of truth”. below is shown a comparison between both developed negatives. left side the image developed in 5 months old chemicals and right side in freshly mixed dilution. both images are color calibrated and exposure is adjusted. let’s see …
the image on the left side has a little less contrast than the one on the right side. this we recognized already when we compared the negatives on the light table. in addition, the green tint on the left image is clearly visible. therefore, it is confirmed that the 5 months old c41 dilution definitely has bad influence to the development process! nevertheless, the negative developed in the fresh mixed dilution shows up bright, contrasty with a little higher luminosity. that’s how it should be.
but i wouldn’t say that the left image is unusable. overall the color fields of the target seem to be still very similar on both images. is it maybe just the tint? within the digital processing it should be kind of easy to improve the result further. getting rid off that greenish tint and increasing the contrast and the luminosity of faded film negative.
… but then there is just another question: “how to get rid of those many scratches and sprinkles!?” 😀


darktable settings
last but not least and if it’s for interest i add nine screenshots from each processing step in darktable. you could see here, that the calculated color profile for the film negatives are actually evaluated as “bad”. it is due to their calculated average values. at least, for me the result for the negative image, which is developed in a fresh dilution is totally usable. still i would do color calibration on negatives.
… for now!